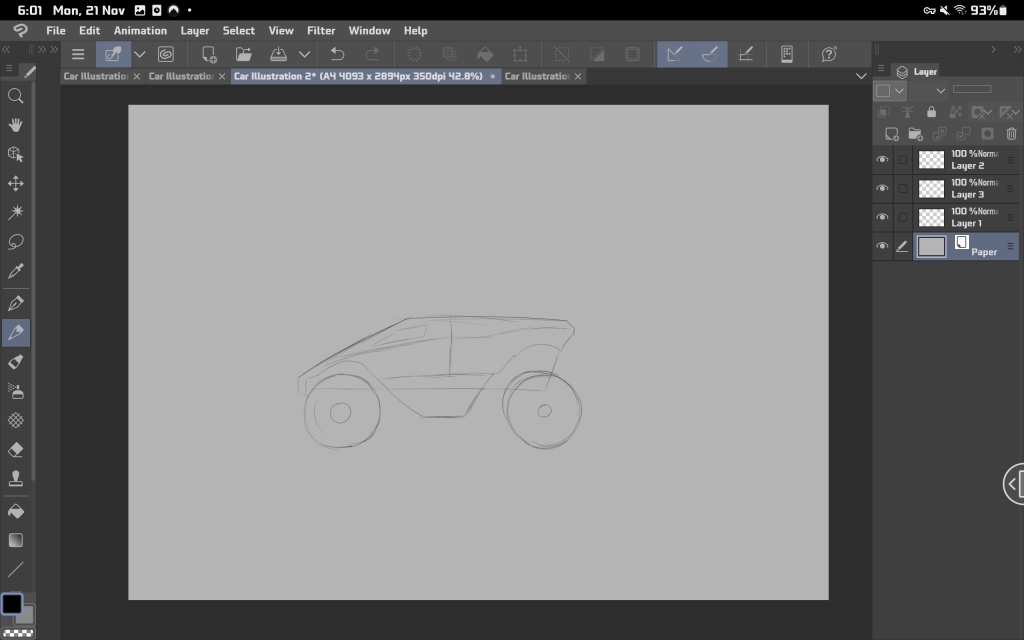
The Second Half of my ICP Module
14/ 11/2022 Interesting Briefs I have come across that I am considering.
Hum3D 3D car render challenge. (I would use Maya to create this)
Brief 3: 3D Car Render Challenge

What I need to do for the brief: (Quick Summary)
Create a 3d model for a car and put it into a 3D environment to make a beautiful render.
You can chose any automobile you like, whether it is racing or imaginary.
Since I can make any automobile I like I’m going to try and design my own.
23days till Deadline (When I started this project)
With this deadline in mind I’m probably looking at making at low poly style looking vehicle but with plenty of detail, as a realistic looking vehicle model can take way longer than 23 days. In addition I’m also relatively new to Maya, but that isn’t going to put me off trying to do this brief.
Why I chose this brief?
Some thoughts I had on my mind and the future?
After using 3d software such as Maya during my time on this course and recently trying Unreal Engine (3d environment engine/ game engine). I’ve come to a decision that I really enjoy working in 3d. And its definitely something I want to look at doing more of down the road.
Its taken me a while to realise this, and initially I came onto the graphics design course not knowing what part of design I liked the most. I chose this course as it has allowed me to try many different forms of media and design:
logo design, editorial design, film/ photography (1st year), illustration, typography, web design, advertising, 3d design etc.
Up until now the things I have created in Maya have been relatively simple primarily consisting of simple shapes. My art/ stationery box I made last year, primarily consisted of boxes and rectangles. The same goes for a sword I made and signage I’ve also made.
I want to do this project as a means to take my 3d skills to the next level.
Research and Inspiration:
I’m going to start of with trying to get some inspiration and some ideas going by looking at various car designs.
Some of the pieces of work other people have already submitted to this project:
Realistic/ Life like
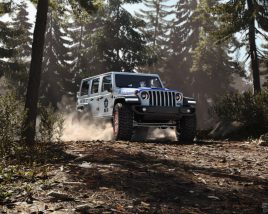

This is the sort of piece of work I am looking at creating. I will create a 3d model of a car and then put it into a 3d environment. At the moment I’m wanting to take the sci fi route, some sort of hover/ flying vehicle.
Futuristic/ Fantasy/ Imaginary


I like this design on the far left the most, this design looks nothing like what you’d expect a typical car to look like. In that sense its quite unique and was the most interesting one I have seen so far. Most cars are long rectangular shaped with four wheels. This one is bubble shaped with 3 wheels. Which are quite thin and slender the two front ones are as tall as the body of the vehicle.
This design makes me think of a tricycle because of the triple thin wheels used.

At the same time because of the use of a small wheel at the back it also reminds me of one of those bikes that have a really large wheel followed by a small wheel.
A Penny Farthings Bike

For my design I would like to go with some sort of sci fi/ futuristic design, whether it be flying, hovering etc. So I’m going to be looking at more sci fi designs.
More Sci-fi car designs:

This design I saw “well how do I put it” it instantly caught my attention all the bizarre, silver alien looking tubing across the body and jet engines peaked my interest. I’m not exactly sure what’s going on with them. Tubing to the engines at the back makes sense, putting fuel into the engines. But tubing at the front? perhaps there’s also a piston engine in front so that the car can drive on land. You can see 8 pistons coming out of the hood 4 at each side.
Diagram showing which part of an engine is a piston if you didn’t already know. Piston circled in red. This is the part that looks like its poking out from the hood/ bonnet of the car above.

The vehicle also appears to be going at high speed, you can tell this from the flames/ fire coming out from the back of the jet engine, also known as afterburner.
Getting back on topic another design
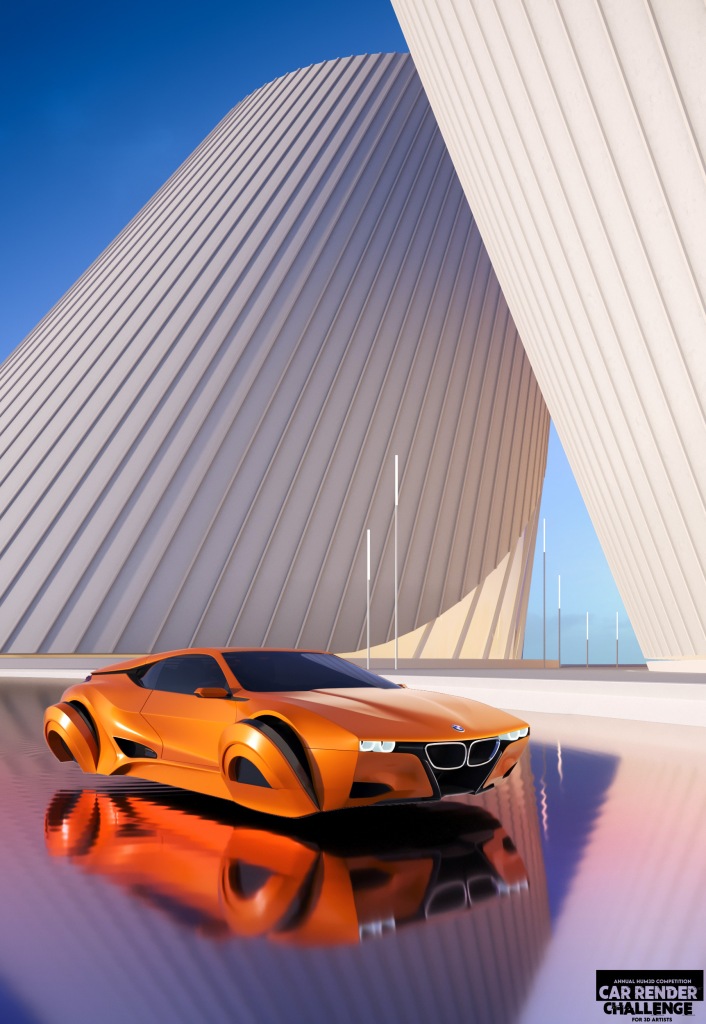
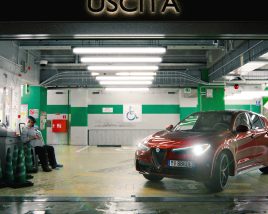
A futuristic hovering BMW. This design in my opinion is just simply amazing, I really like how clean the overall appearance of the scene looks. The car is very modern looking and minimal. They have also used a background that reflects this style.
If I take a look at a real existing BMW I can see that this design keeps inline with BMW’s style Clean, minimal, uses sharp angles and lines on corners.
This design appears to be some sort of futuristic Porsche 911. Though interestingly despite appearing to be a hover vehicle from the back thruster, the front has wheels instead.
It drives around on the front 2 wheels whilst hovering on the back? I’m not sure this would be easy to drive, I feel the back would spin out as you go around a corner, thrusters don’t exactly have grip on the road. Though the overall design definitely has that racing style going on with the spoiler and black stripes on the side. Perhaps the driver of this vehicle has modified their ride in such a way so that they can do lots of drifting. The background is roads and street, so maybe street racing.

This one has the police theme going on.
The render features flying hover beetle cars. I really like how they have used beetle cars with flying elements, hover engines it appears. This is because the insect beetle is able to fly, whereas the beetle car in real life cannot. So using the sci fi theme they have given beetle cars the ability to fly.
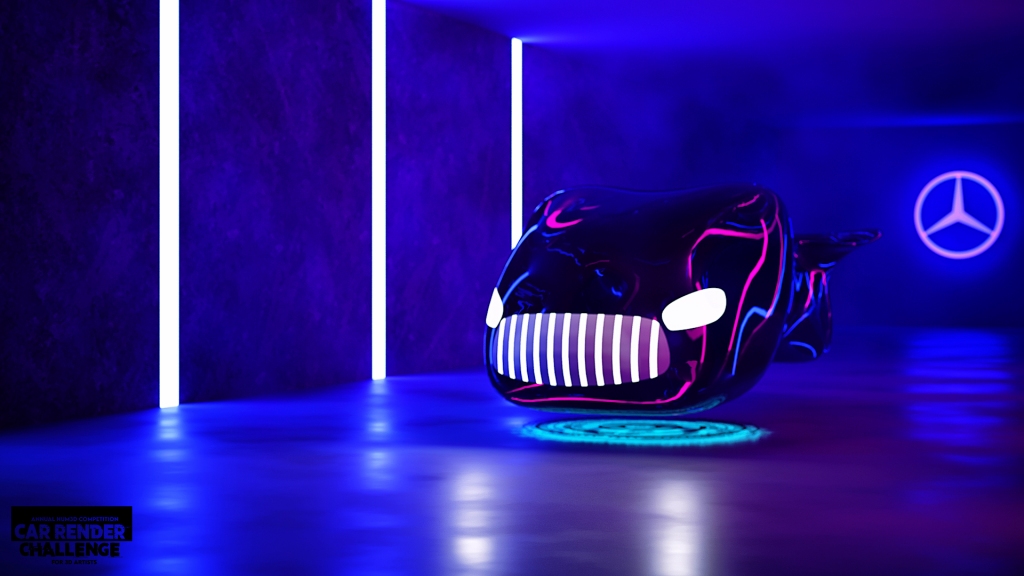
One of the most bizarre designs I have seen, but from the way if looks it makes me think of some beast or monster. The headlights look like eyes and the grille looks like teeth. The neon lines on the body of the vehicle in my opinion look like veins, further reinforcing the beast/ monster style appeal.
After looking at the above image again it kind of also looks a bit like a whale, the front is its head and the back top of the body looks a bit like a fin from its tail. And the blue background theme going on could suggest sea or water.
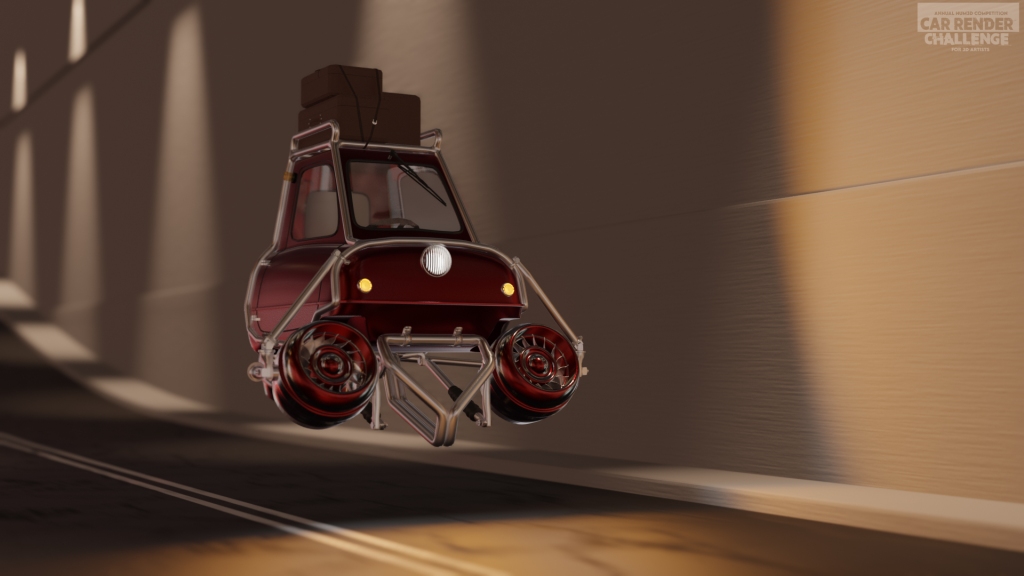
This ones based on the worlds smallest car Peel P50. The use of only 2 thrusters emphasises how small this car is. Most cars have either 4 wheels or futuristic cars have 4 thrusters/ hovers whatever you want to call them. Though I’m not sure if this would be balanced when hovering across the ground with all the power in the front, I feel as if it would flip over. Though this problem was also present in the real p50 if would flip over easily when cornering due to its light weight and only 3 wheels.
This car is small and lightweight enough to be pushed around by a single person when needed.
With my car design I would also like to have a sort of apocalyptic aspect to it. Something that suggests wasteland, desert, salvaged.
Mad Max:
An example of this is can be Mad Max originally released 1979. However the examples below are from Mad Max Fury Road 2015.

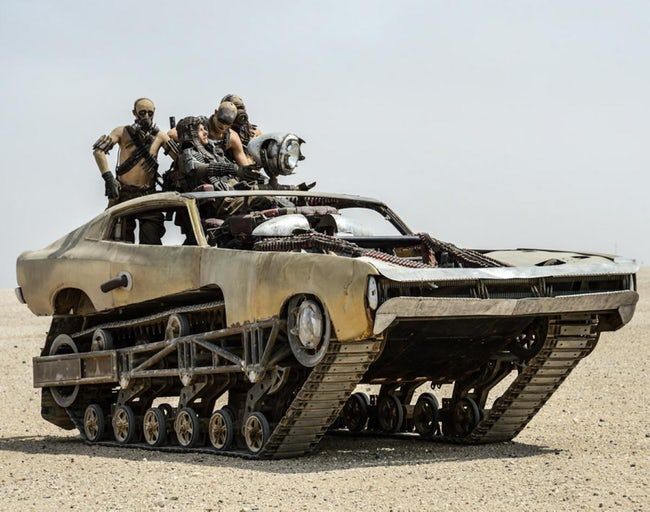


As you can see the vehicles from this film are vehicles from the real world that have been salvaged, repaired and combined with several with other parts. The buggy in the bottom right has had spikes welded all over its body, this car is more of a weapon than anything else now. And I believe that’s a mustang in the top left. It has been combined with tracks to better its off-roading capabilities.
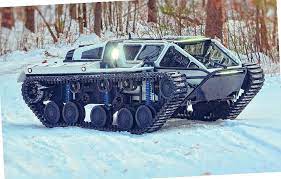
These tracks could be potentially from a real life vehicle such as the ripsaw. It definitely shares the same kind of chassis/ shape.
SpongeBob car The “Patty Wagon”:
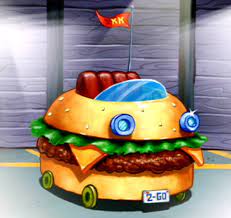
Not much I can really say here, its a burger on wheels (olives in this case) Though the number plate is quite humorous “2-Go” a phrase often used in takeaway, ready meals or fast food. Fast food as in this burger is going to drive really fast, rather than the usual eaten type.
The headlights, which also look like eyes to me are meant to be windows from a ship. Since “SpongeBob SquarePants” is set in the ocean this works well.
Reminds me of a tutorial session:
This brief reminds me of a tutorial session way back in year one with Jenna. I’m bringing this up as the task we did in that session and the brief I’m looking at now are quite similar. The task Jenna had us do was to draw a car. It was only a 5minute task, so in that time frame we were only able to sketch up some badly looking drawings. Though that wasn’t the point, the point was too see how different people interpret what a car looks like. The most common result was box/ shape with four wheels. About what you’d expect a everyday car to look like and the first thing people would think of.
By reflecting on this tutorial task it can help me to think outside of the box and try to create something a little bit different from what the first image that pop in someone’s head from hearing the word “car”. This can be known as image association.
Update: Since the brief specifically asks for a car I cant get too wild with this and what my vehicle looks like. It still needs to suggest car and be one relatively one of the first impressions you get when you look at it.

Cars I like:
Since I’m going to be designing a car, it wouldn’t be right if I didn’t look at some cars that I like myself.
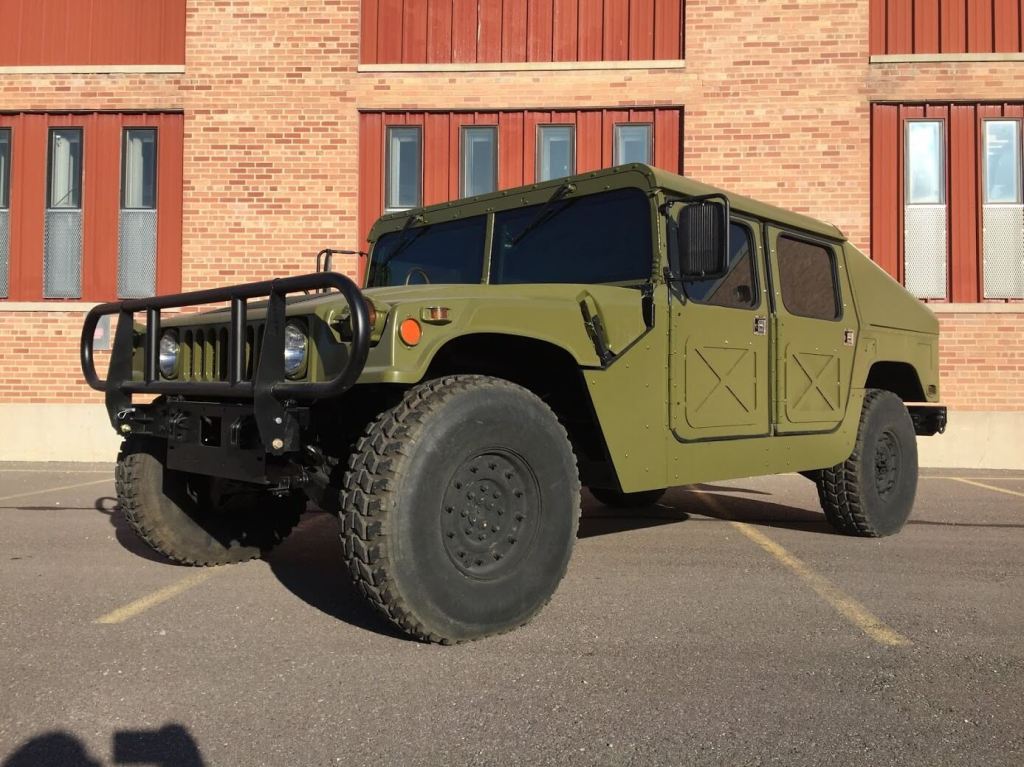
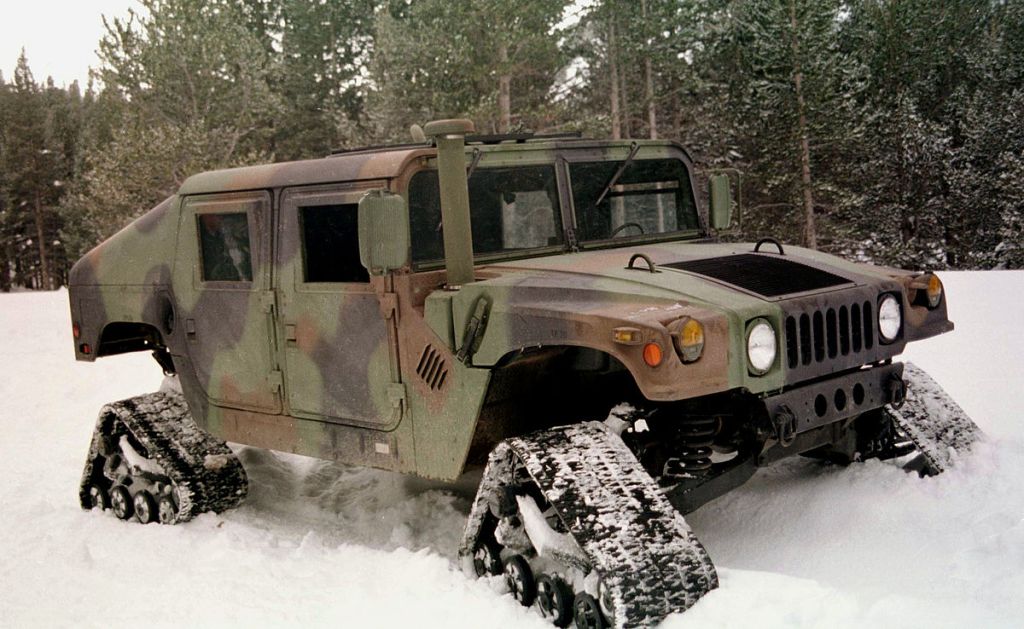
I like the Humvee as its the sort of vehicle where myself anyway. “Got a few scratches, bumps and bangs?” who cares, it will give it a nice battle worn look. A nice sports car and one little scratch is all it can take to ruin the look. This car doesn’t care where it goes, It can handle pretty much all terrain, other than probably a mountain or something along those lines.
Humvees are maintainable, reliable and built to survive. Its spacious enough to bring several people along and It even has extra space in the back. Some variants are a pickup style for even more storage.
The robust and industrial look, with straight edges and sides is what appeals to me. Its gives the vehicle a sense of power or strength.


When it comes to car design I prefer those that use sharp angular like structure. And also Classic and old cars. In my design I’m going to try and go for this kind of style.
Car Idea update:
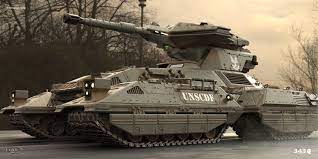
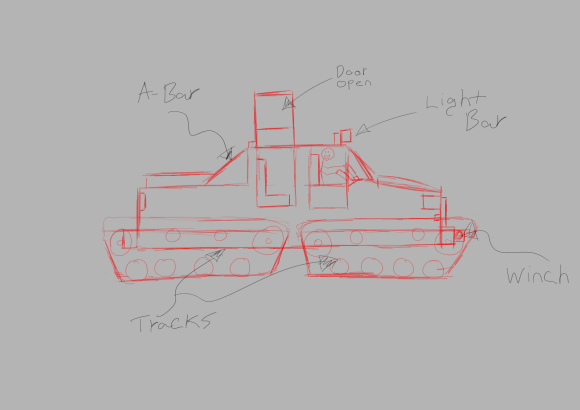
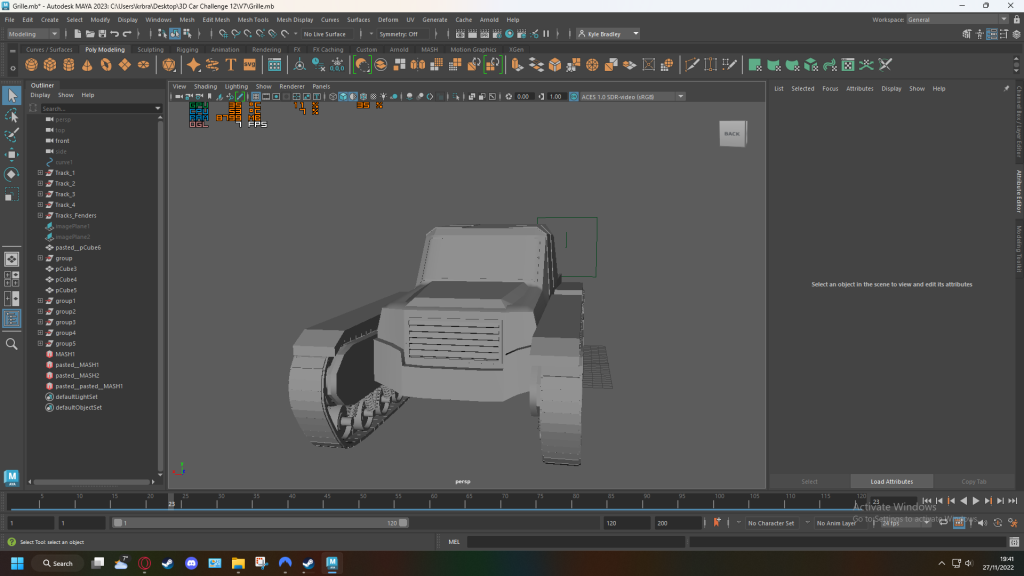
I have changed my Idea for my car design I want to do. Rather than something hover or flying based I want to create a vehicle which uses tracks for movement. I’m going to give the vehicle 4 tracks instead of the usual set of two found on most tracked vehicles in order to make things a bit different.
It is not a tank it is a car on tracks therefore should be accepted by the challenge.
A tank is described as:
A tank is an armoured fighting vehicle intended as a primary offensive weapon in front-line ground combat. (Therefore not allowed)
I only mention this as tanks can come to peoples mind when they think of tracked vehicles.
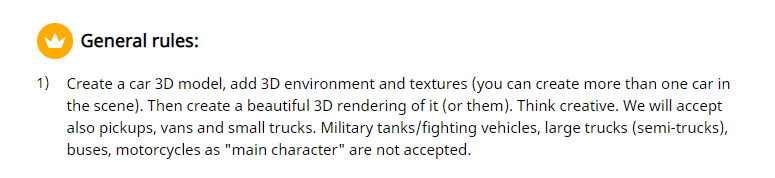
Cars that people have put tracks on:
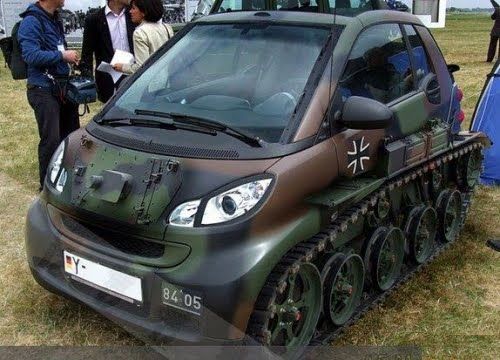
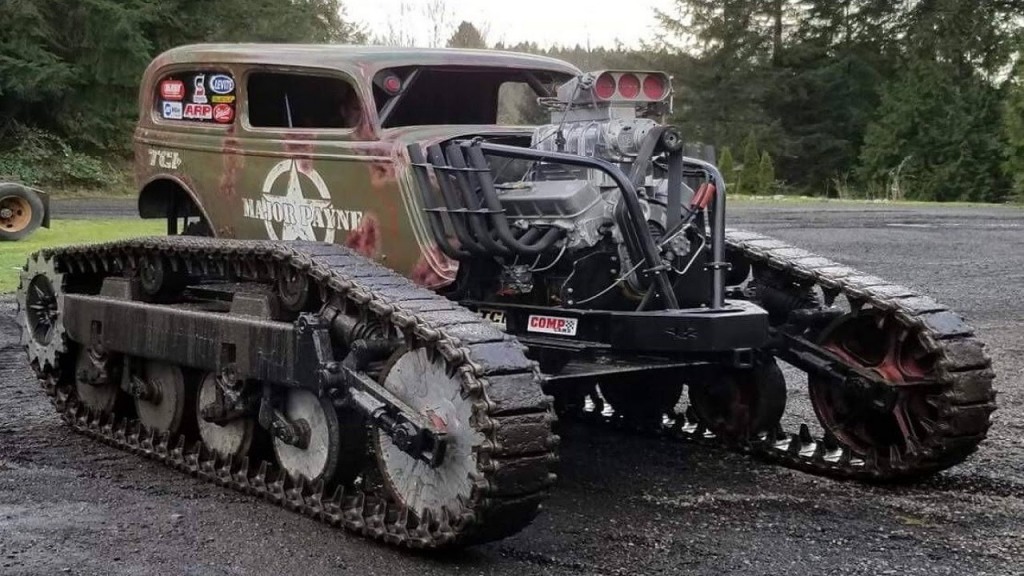
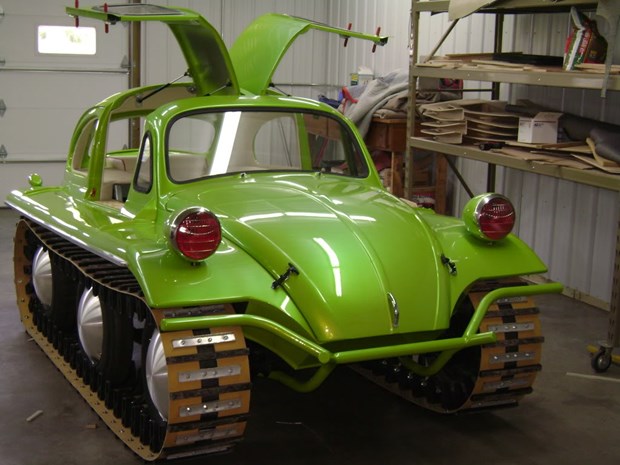
As you can see cars that have combined tracks before have either gone with 2 large tracks or 4 relatively small tracks. This is why I want to go with 4 large tracks as I haven’t seen it really done yet/ quite uncommon.
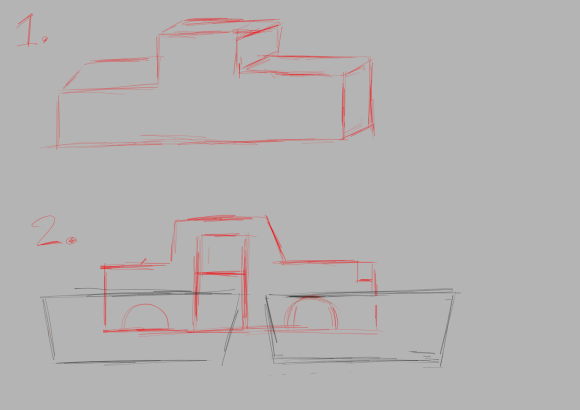
Initial sketches:
I’m going to start with sketching some designs out.
First initial car design I had in mind early on in the project, rocket league inspired buggy. (Game)
Second Design I had in mind that I sketched out properly a bit more, DeLorean/ Lamborghini inspired.
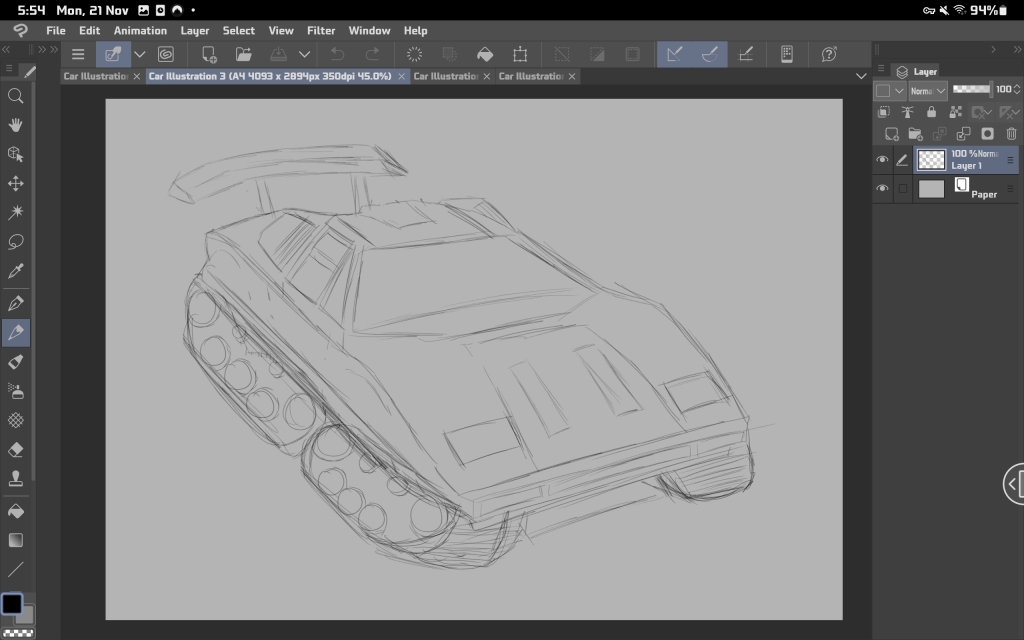


The car design I have come up with is a bit of a mix between a Delorean Car and lamborghini fused with 4 tracks. However, after some feedback. When I come to make this In maya I’m not going to include the spoiler. Tracks only have a limited speed they can go before they tear themselves apart. The max speed recorded by a tracked vehicle is about 55mph from the Ripsaw. A spoiler is used on a car to increase downforce to prevent the back of the car going airborne when going at very high speeds due to air uplift under the vehicle. Under 60mph a spoiler is generally useless other than aesthetic purposes. Plus it also has its increased weight from using tracks instead of wheels to compensate for this anyway.
(Design Change and more sketches later on)


Creating the tracks:
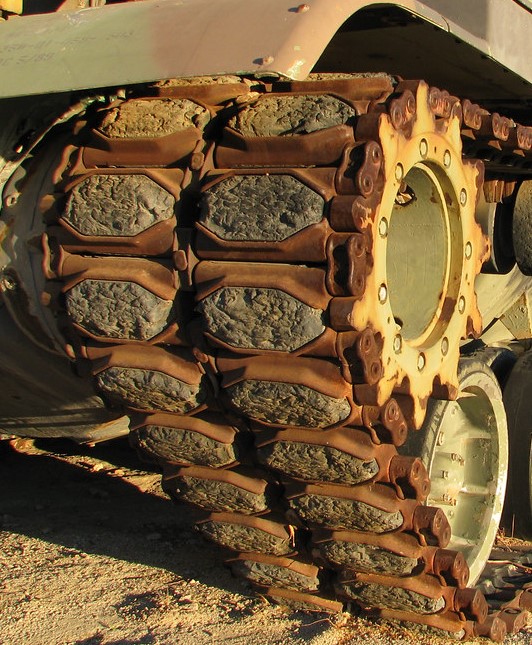
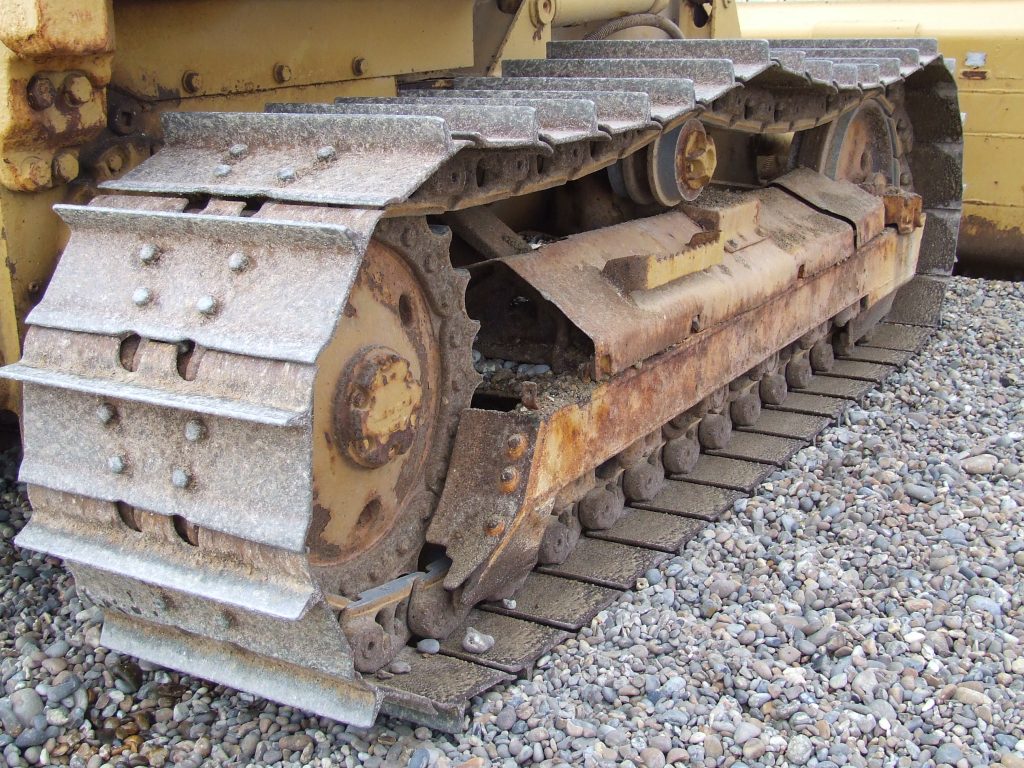
Looking at tracks on vehicles in the real world.
This will help me to create the tracks for my vehicle.


One of the main reasons why I decided I wanted to go with tracks on my vehicle is well simply because I like tanks. So without further ado here’s some tracks from tanks.

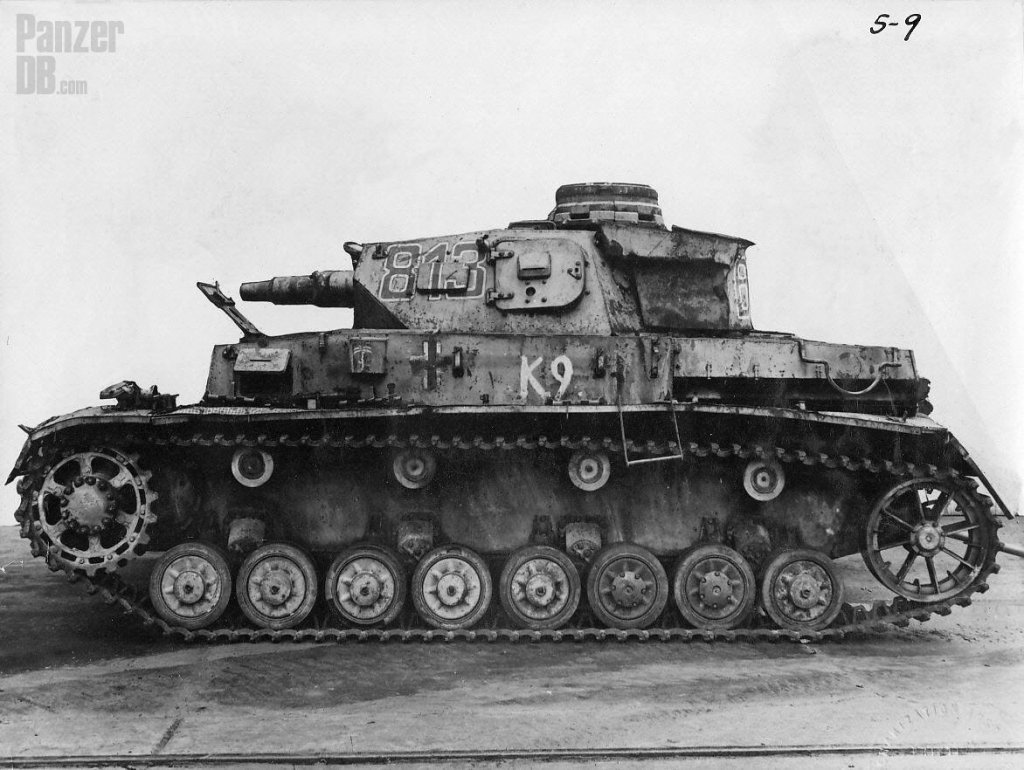


The above tank used a different sort of track style as opposed to what you might see on later and modern day vehicles. The track goes much higher up as opposed to those in the earlier above images.
Tracks work by a primary powered wheel spinning turning a track which in turn causes the other wheels to turn. The bottom wheels are on suspension to allow it to climb over rough terrain. By using a track the vehicle is more like dragging itself/ crawling across the floor as opposed to rolling as do wheels.
By having a much higher surface area on the floor than wheels this creates a much larger amount of traction. I suppose this is where the name “tracks” derived from
Basic Track Shape:
One of the videos I watched to learn to make tracks:
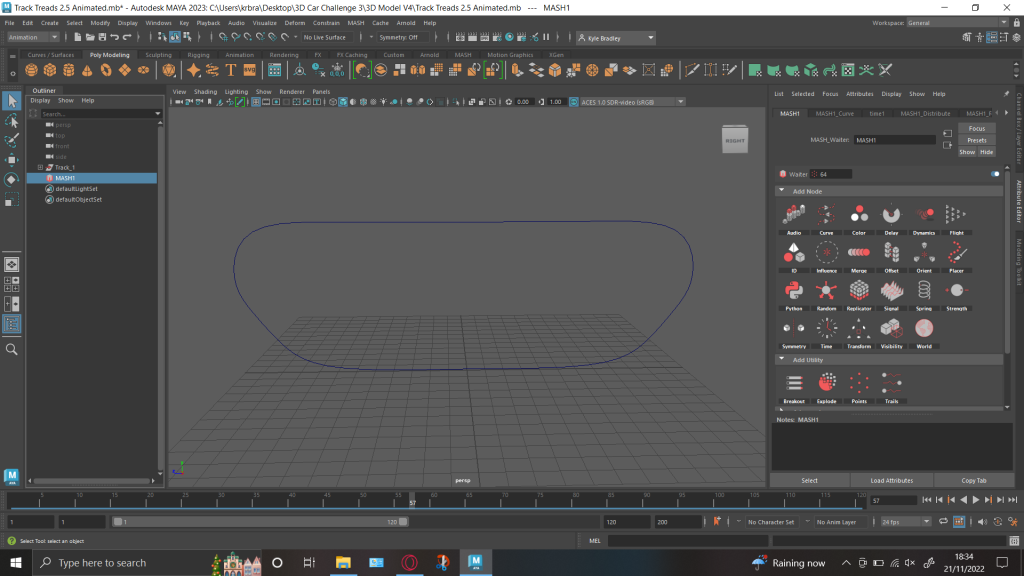
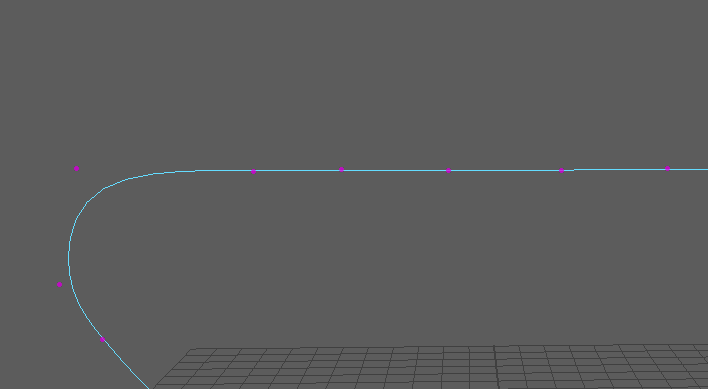
After learning how to do so creating the basic track shape is somewhat akin to using the pen tool in illustrator. I imported a circle based path and increased the number of points to 18 to allow more flexibility in the track. Default is set to 8 points/ nodes. In the image below you can see the nodes I am able to move these around to change the shape of the path.
The next step is adding the tread/ track links around the path to do this I used an animation feature I learned called Mash Network, it allows you to apply various effects and animations to objects. The reason I’m using this as one the options “Curve” allows me to put an object going around a path which is what I want here. Curve is the second one from the left.


Here is my basic Track Link shape I have created and after applying mash network it is duplicated in a line.


Now I add the curve option onto the mash network and apply the path I created at the start to get the track link going around, I had to adjust some parameters to get an adequate amount of track links going around and to also adjust the spacing and size.


One of my favourite parts of using this method is that the track even spins/ goes around although the brief is only asking for a still image. I will show this further down once I also made the wheels that go inside the track which pull it around.
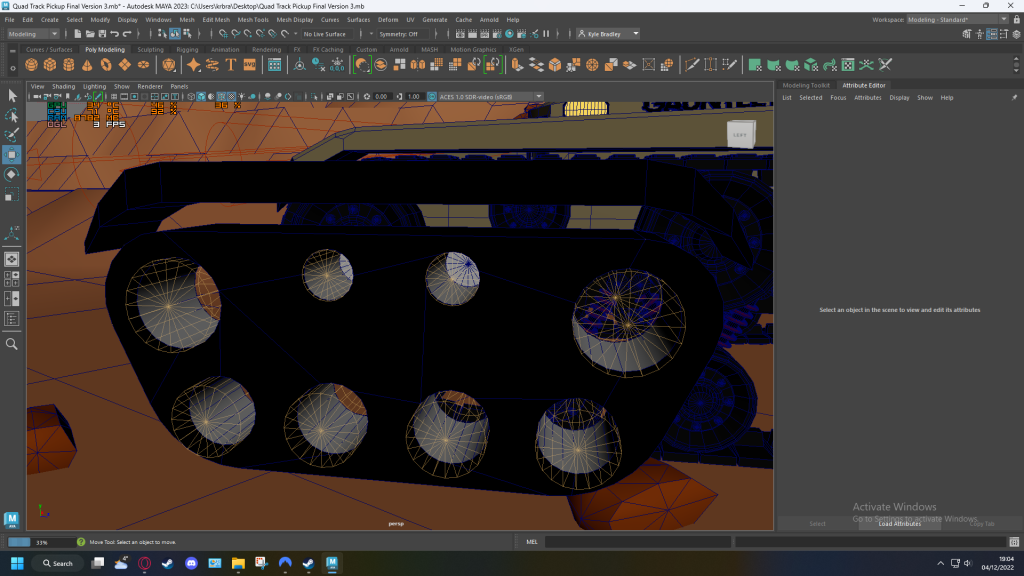
Creating and Adding Track Wheels:
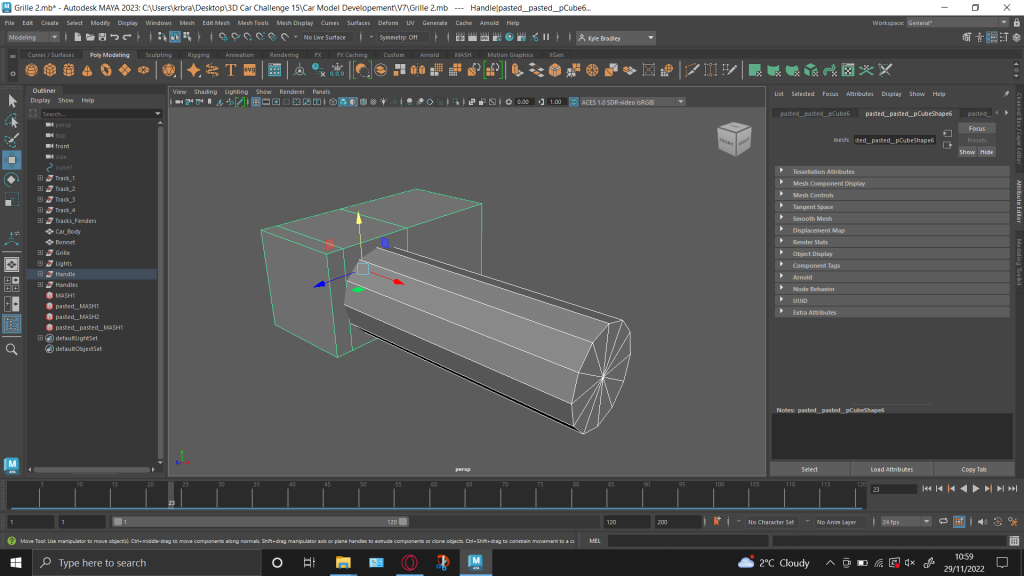
I started off with a cylinder shape and extruded the sides to create the hollow cut out section on the front and back of the wheel and used edge loops to create the crevice for the inner side of the track to go into to.

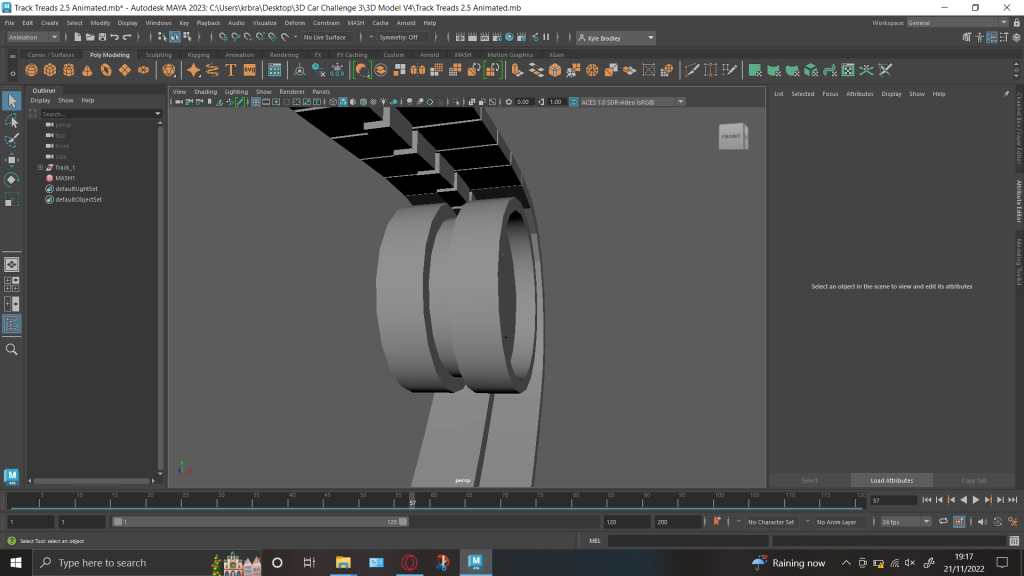
Following this I then duplicated it and placed the wheel throughout the track. The below image is actually a later image/ version. My first version of track wheel placement had it so that the wheels were not all the way to corner/ section of the track which turns. In reality these wheels are what make the track wrap around.
Earlier Version Below:

As you can see its quite the improvement as opposed to one above. I have also shrunk the wheels along the bottom so that if this was real they would not be as difficult to turn. The Two Wheels in the top two corners are the largest as those would normally be the powered wheels on a tracked vehicle. This is because by powering the larger wheels its easier to rotate the smaller ones. As opposed to trying to turn a large wheel using a small one.
The diagram I found below shows how the drive shaft is connected to just the back two wheels of the track system of common track based vehicles.

Due to my vehicle using 4 tracks I will have to think of how the engine is also connected to the 2 front tracks as well, that’s if the engine is positioned in the back. The vehicle could have 2 engines though that would be quite inefficient in the real world. It could be battery powered and have 2 drive shafts connected to the battery, or it may have an universal axel joint connecting a front drive shaft to the back engine. I haven’t quite decided upon this yet.
Also please note whilst I do know some stuff about cars and vehicles and how they work, some bits could be wrong since I’m not an expert with this type of stuff. Though I am trying to think about how my vehicle design would actually work in the real world and whether or not it would be functional.
Tracks Spinning:
I have also added a spinning animation to the wheels so that they look like they are pulling the track around:
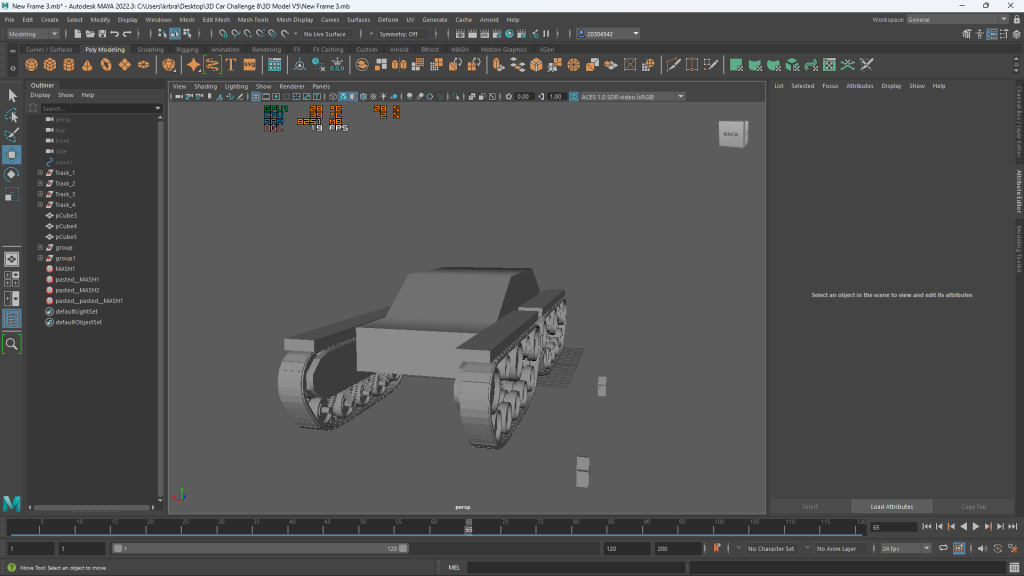
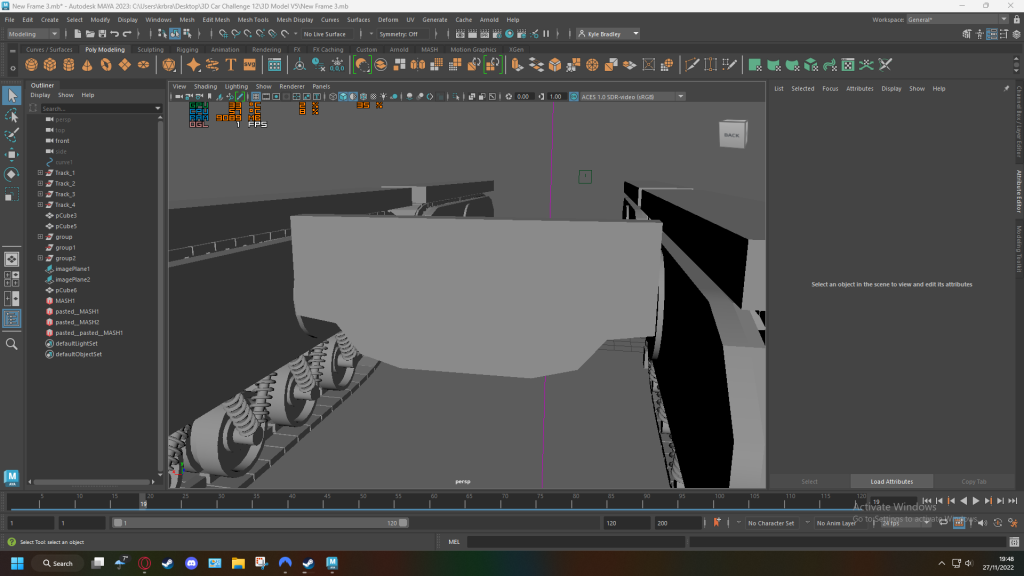
Making the vehicle Platform:
I now began to create the main platform for which the vehicle would sit upon. A bit like this image below. This is the frame for a US Willys Jeep. When stripped down you are just left with a frame, wheels and an engine.
Video of Jeep being stripped down:
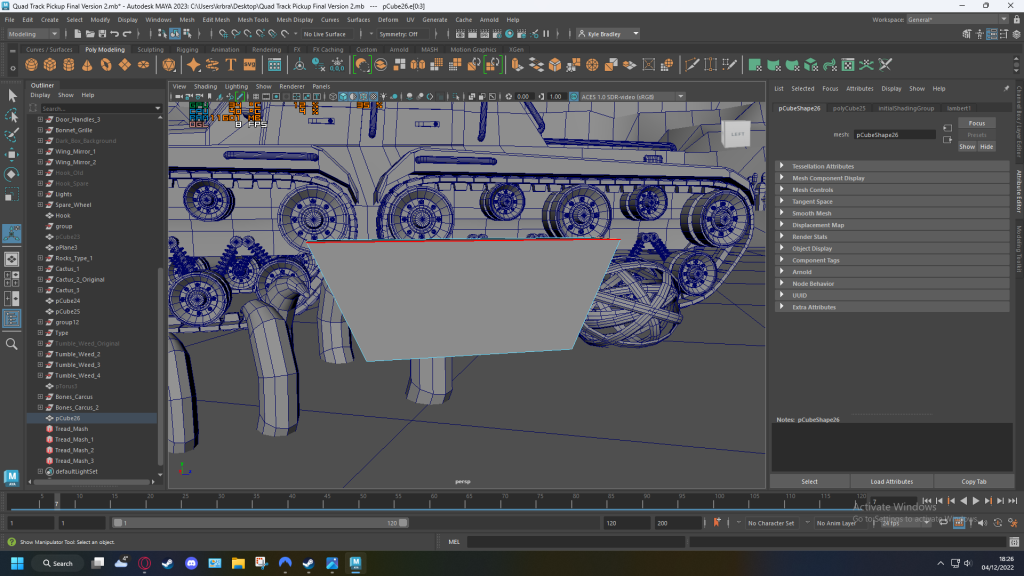
I started by duplicating the main track I had created four times to make a quad style setup. I then began by using a box to make a platform in-between, Ignore the fact it uses my older version of my track this was before I updated them.


A major flaw in this design came to my attention. Because its using a quad track setup, instead of just 2 tracks. When going over a hill or bump the front section will raise but the back wont and with my vehicle being a bit longer than most this would in the real world cause excess stress in the middle section of the vehicle potentially resulting in a snap.
I still wanted to use a quad track design as its a bit different from traditional tracked vehicles.
I found 2 different solution to solve this problem.
- Have a split in the middle, a bit like a door hinge sideways or those busses that have a split in the middle, except up and down instead.

I didn’t like this first solution I found as the vehicle felt like it would be more like a car towing a trailer now, I want my vehicle to be on one platform.
So I found another solution:
the tracks themselves would turn up and down themselves when going over a bump, its hard to explain, but somehow I found this image of eBay of a remote control vehicle platform of the sort of idea I had in mind.


As you can see on this design the platform in the middle is on on a sort of swivel connection between the two different sets of tracks. This causes the platform to to move up and down as the tracks go over an object as seen in the image. Though if I chose a design similar to this it might have to me battery powered with 4 motors in each corner where the wheels are. I don’t think you would be able to have an engine then an axel going to the wheels being that the axel would be bent when you go over a hill.
A sci fi vehicle I know that uses a quad track design is a tank from the game “Halo”, ignoring the fact that this is a tank and has big gun, looking at just the bottom section it uses a 4 tracks individually connected to the main chassis, this means the tracks would turn and change position according the the terrain.
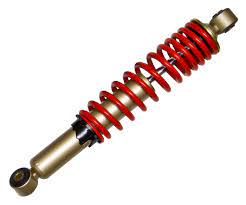
Creating Suspension:
Before I attempt to make the new platform I need to add suspension to the bottom wheels of the track that run along the ground as of right now they are floating in the air. I make use of a shape tool called helix which creates a spring like shape which I can adjust the size of and number of coils. I put a cylinder inside to look like the strut inside the coil.


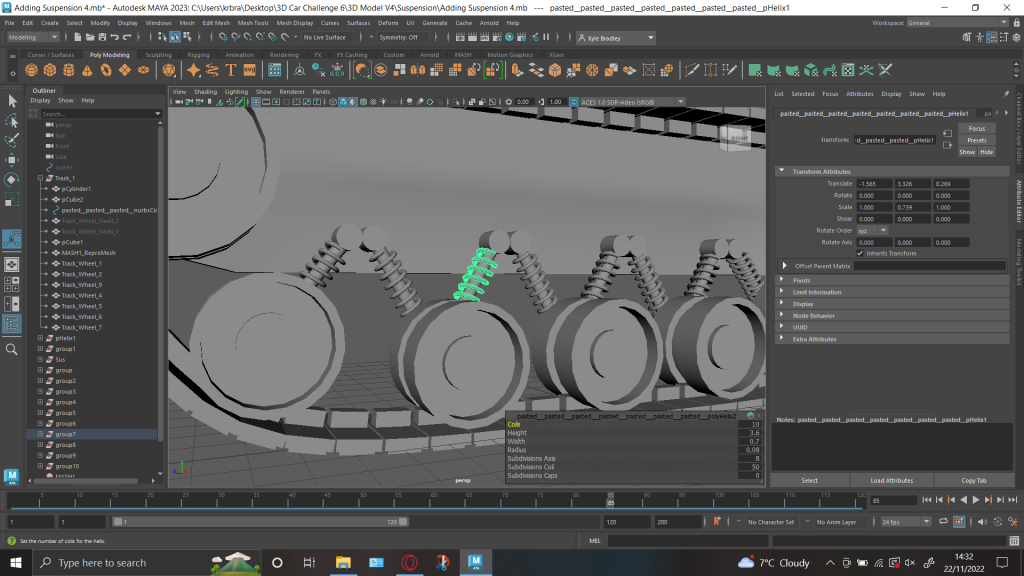

You may have also noticed the backplate I have added to the opposite side of the track this will be for the new platform design I will explain below.
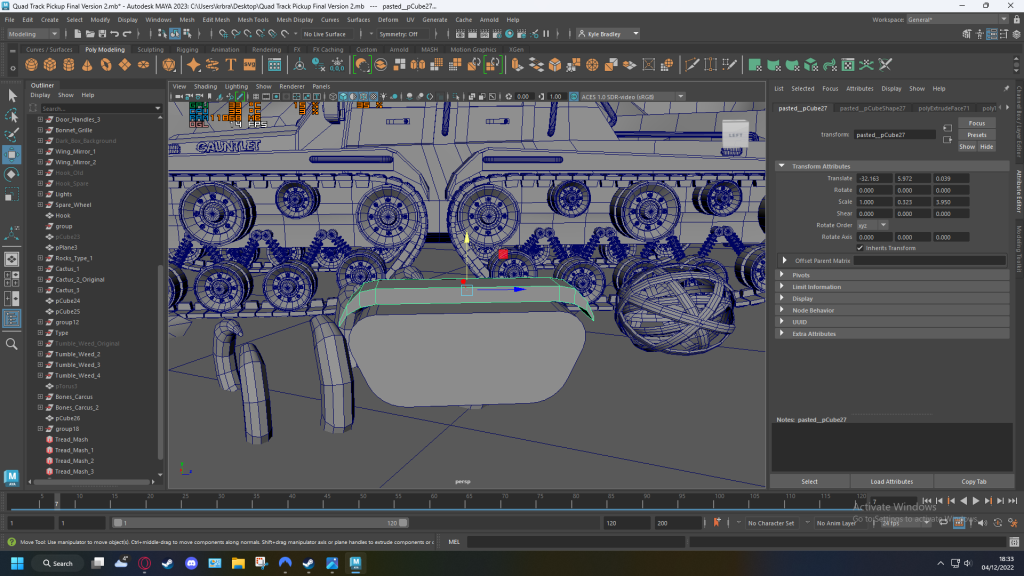
New Platform design:
Making the new platform with the research above in mind.
The new platform/ track design consists of each track being individually connected to the body of the vehicle via some sort of rotating joint, essentially where a wheel would be a track has taken its place. This means when the tracks go over a bump the platform the car will be on is raised upwards with the track.
The cylinder in the middle represents where the tracks are joined to the body of the car.

I have also added an extra wheel into the track, this will be the powered wheel (the wheel that is turned by the engine or battery). I changed it to the middle as the connection point to the tracks and platform is also in the middle. This would also have to be the part where the axel/ driveshaft part goes that turns the wheels. I cant add more than 1 connection to each track otherwise it would no longer move like in the diagram I made below.
Rough sketch to show what I mean:

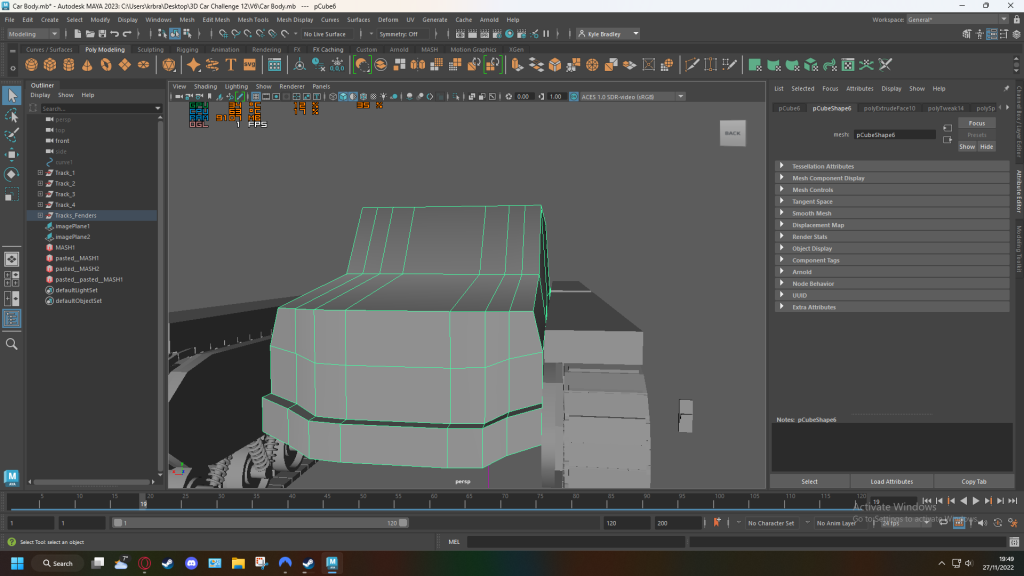
Car Body:
Just a quick mock-up I made by adding basic shapes on top of my tracks to get an idea as to the sort of shape it might take when I create the main body. Shelves/ platforms on top of each track for a person to climb up/ onto and also for storage strapping things onto the outside.

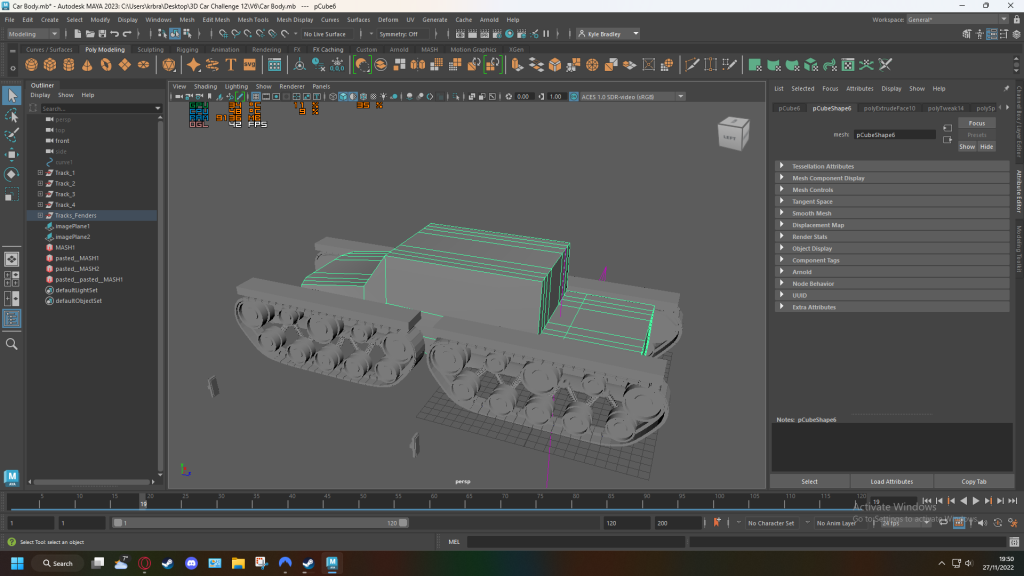
Car Body Design Change:
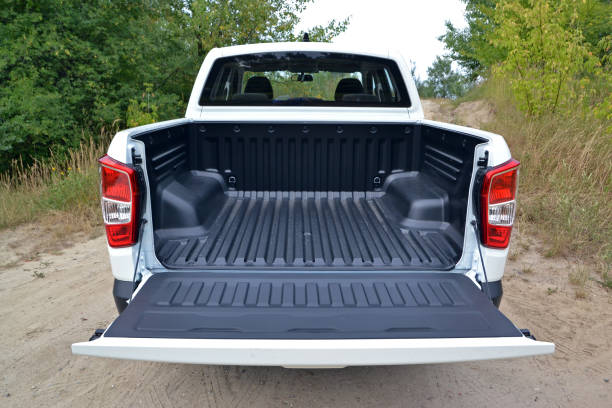
Following some feedback, since my vehicle uses tracks which limit its speed a sports like design isn’t needed, it doesn’t need to be aerodynamic, So I’ve decided to go for something more robust and durable, also a lot bigger which works well since my track base is quite long.
This is an example of the sort of vehicle body I have in mind and will use this as an inspiration to create mine.
Flying Huntsman 6×6
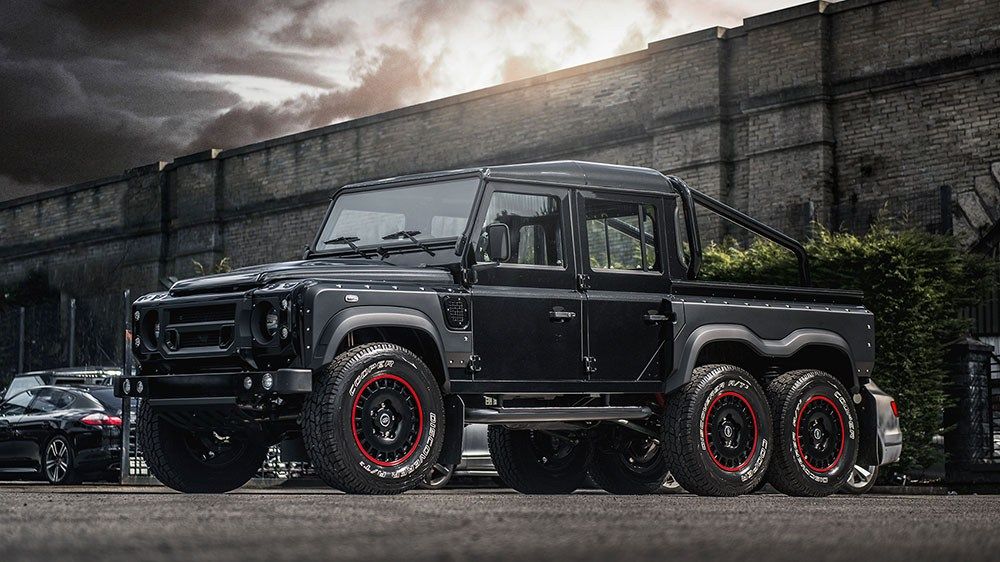
I want to make pickup truck style vehicle as they are a very good all rounder utility vehicle. A large pickup like the one above can seat 4 people and carry plenty of cargo in the back. The heightened suspension also makes it suitable for rough terrain.
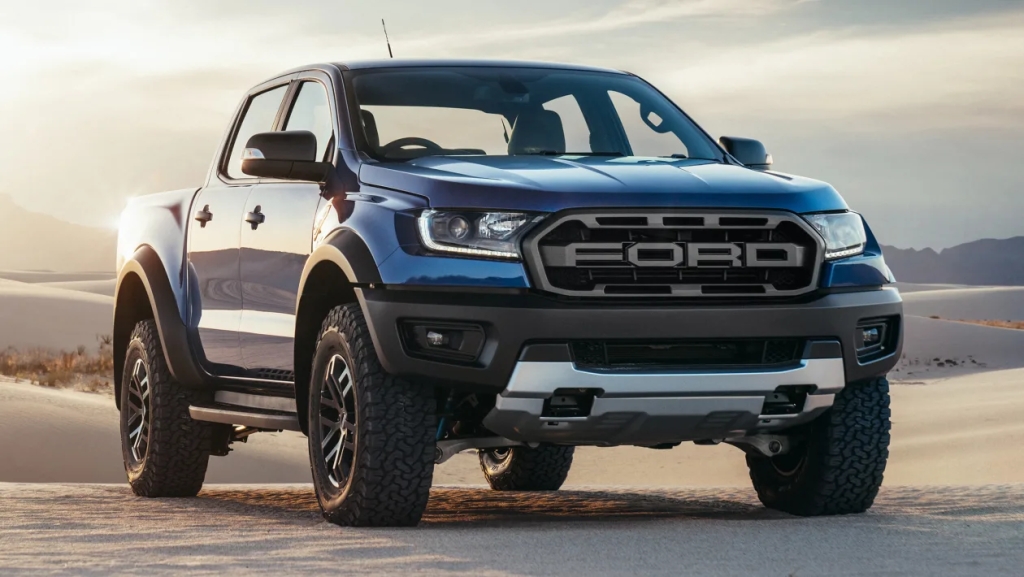
Other Pickups:

A lot of more modern cars and vehicles today appear to stick to using clean one colour paint jobs but with a metallic finish. Car bodywork components are usually painted with spray paint to save on time/ money and to get an even finish.
Using 2 different colour spray paint on one part e.g. the door would end up looking very messy/ graffiti like. The other option is to spray paint each part a different colour. But then you would end up with very defining lines/ sections between each part of the vehicle. Such as in the image below:
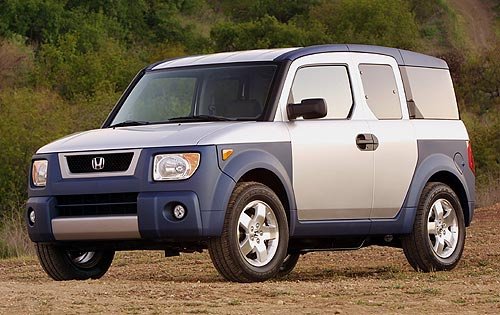
In my opinion I very much dislike this look as the vehicle no longer looks like its one single piece/ together. Gives me the feeling that the vehicle was scrapped and salvaged together from other vehicle parts.
The car above “Honda Element” with this choice of two tone paint job was not very successful and was soon changed back to a single colour.
Painting car parts individually makes the process more expensive too. The parts can no longer just go through the same assembly line/ process but have to be separated and done on their own.
Sticking to one colour makes the whole process of vehicle painting a lot simpler, and this is definitely a bonus if mass producing.
Quora Link (where I found some of this stuff out)
At least the metallic finish brightens parts of the vehicle up depending on the lighting and angle.
Whilst looking at pickup trucks one thing that did come to mind was an old episode of Top Gear which features a pickup truck. Somewhat related, as the episode is about the durability of Toyota pickup trucks which is put to the test.


Here’s a part of the episode if interested:
Probably not the case for all pickup trucks, but this Toyota proves itself to be quite indestructible. Time and time again it is brought back to life. And in the case of everyday activities and off-roading minor damage isn’t going to effect its driving capability. The damage tests done to this Toyota are very far on the extreme side.
If you want a vehicle to be robust, reliable and easy to maintain your probably going to want to ditch most of the fancy gimmicks such as automatic opening doors/ boot which can be seen on some modern day vehicles. Its just more things to go wrong/ break in my opinion.
So I’m going to make my vehicle design robust and square looking and include mainly just the essential features of a vehicle, to try and reflect that its highly durable and strong.
Sketch of new design I have in mind:
Since I already know what my tracks look like I didn’t bother including them in every sketch.
Also I’m going to try not to overcomplicate the primary shape unlike my first initial sketches doing so will make the car much harder to make when I come to properly model it, considering I don’t have too much modelling experience yet.
- Basic Pickup shape.
Sketch 2: I realised the body of the vehicle wasn’t going to be long enough to compensate for the length of the track base, I’ve settled on what I’ve created and don’t want to make any major changes to this now. My tracks work and look nice. I’m going to work around the shape of my tracks.
So instead decided to lengthen the body

3. Lengthened Body of car, made it a 4 door instead of 2.
4. Adding some details, Doors attached to top of car so that they open upwards. (Wing style Doors)
Final Sketch
I haven’t sketched it but I think I may also curve the roof up a bit. Extra headroom and the angular structure will give it a modern look.
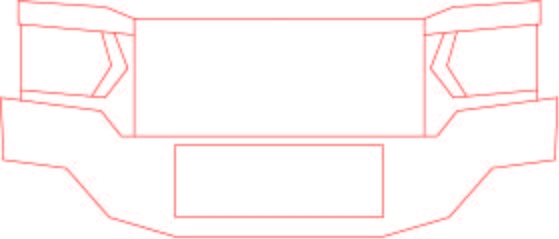
Sketch of front grille to allow me to create a basic front shape from it and then from there be able to begin forming the shape of the vehicle.
Development:

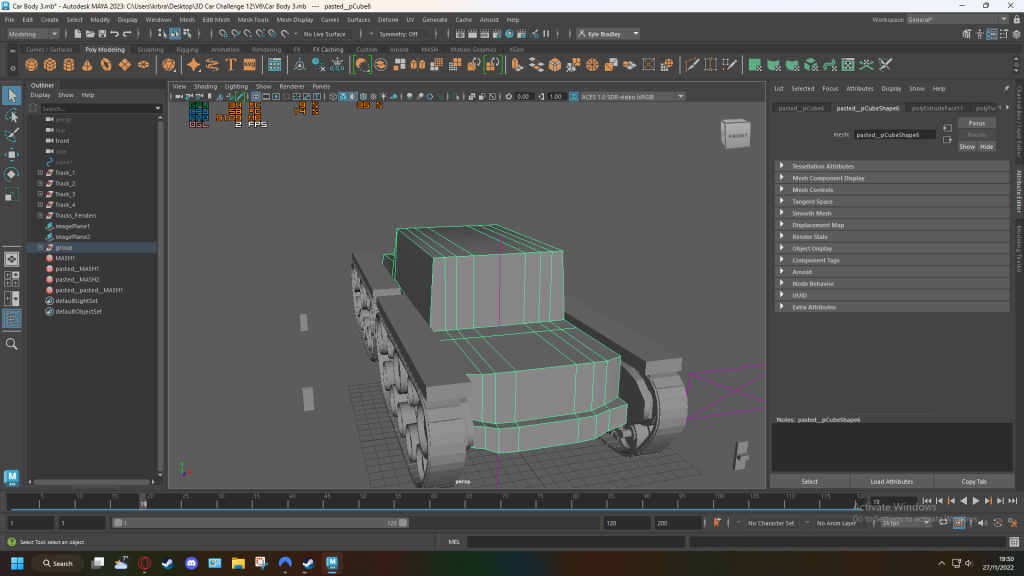

Sloping Fenders now
The vehicle will have a large cargo bed area on the back.
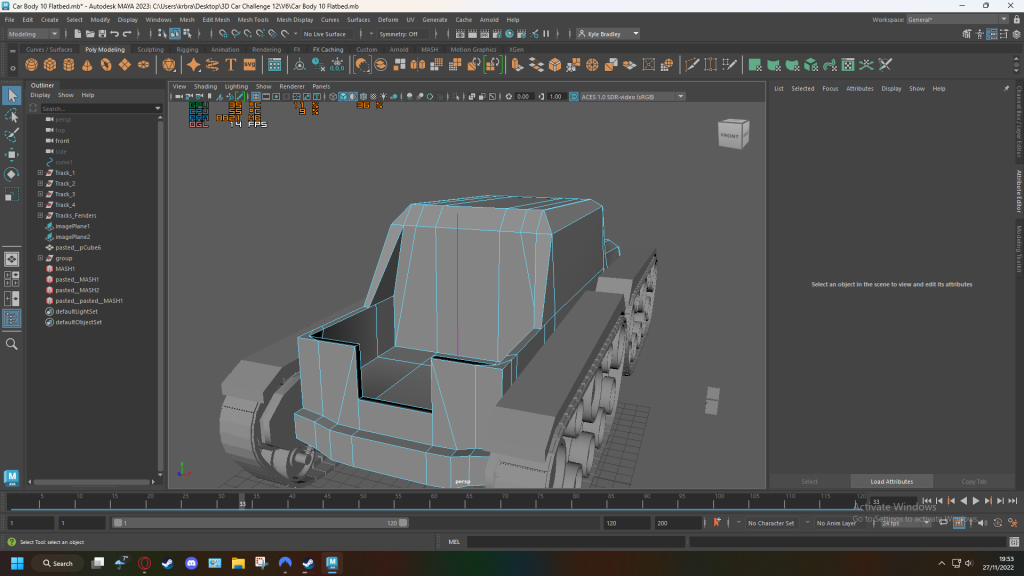

Main Body shape complete. Time to start adding details such as the grille, doors and windows, lights, mirrors etc.

The car will use doors that open upwards wing style doors. This is to ensure that with the tracks being in the way there is still enough room for someone to get in. You will be able to climb onto the side of the track and then into the side top area I will model some handles on the side later on.

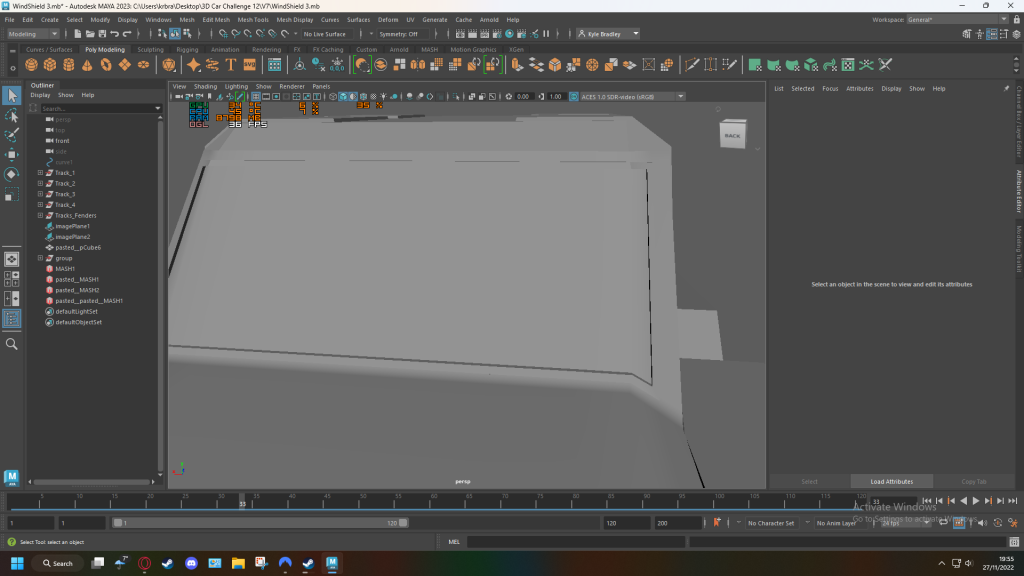
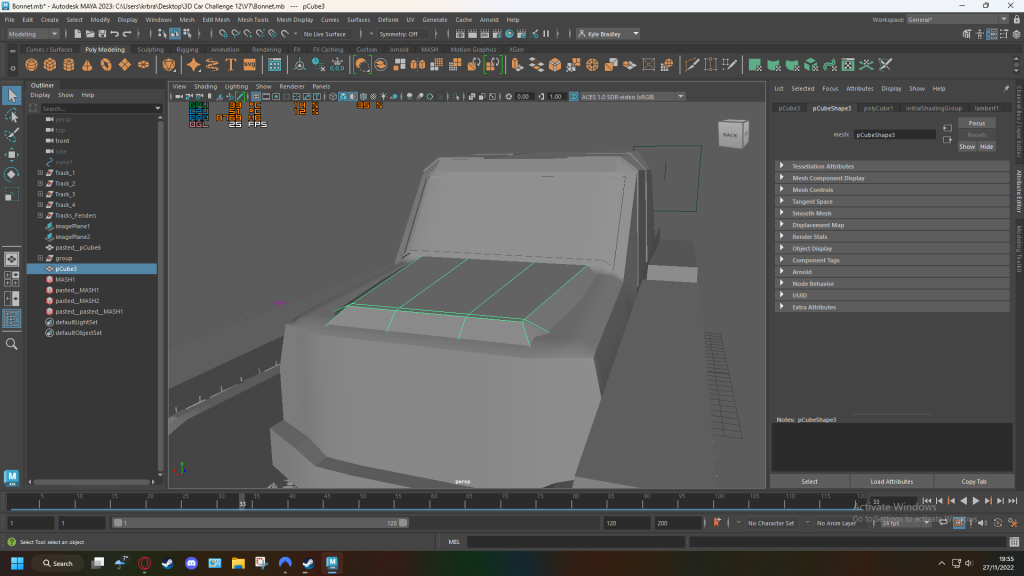
Bonnet:
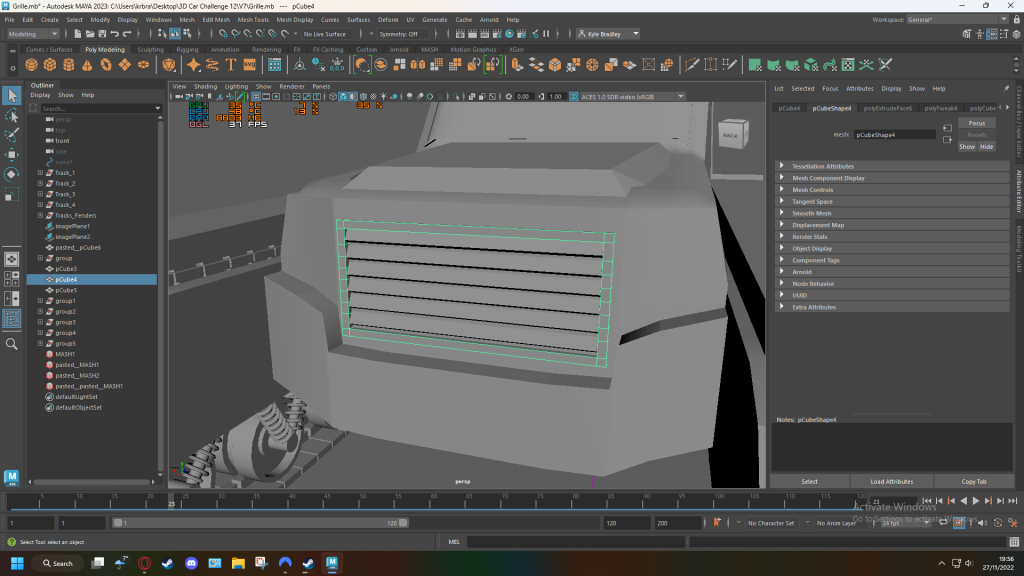
Grille/ Radiator:
Created by placing slanted rectangles inside a rectangle extruded inwards.
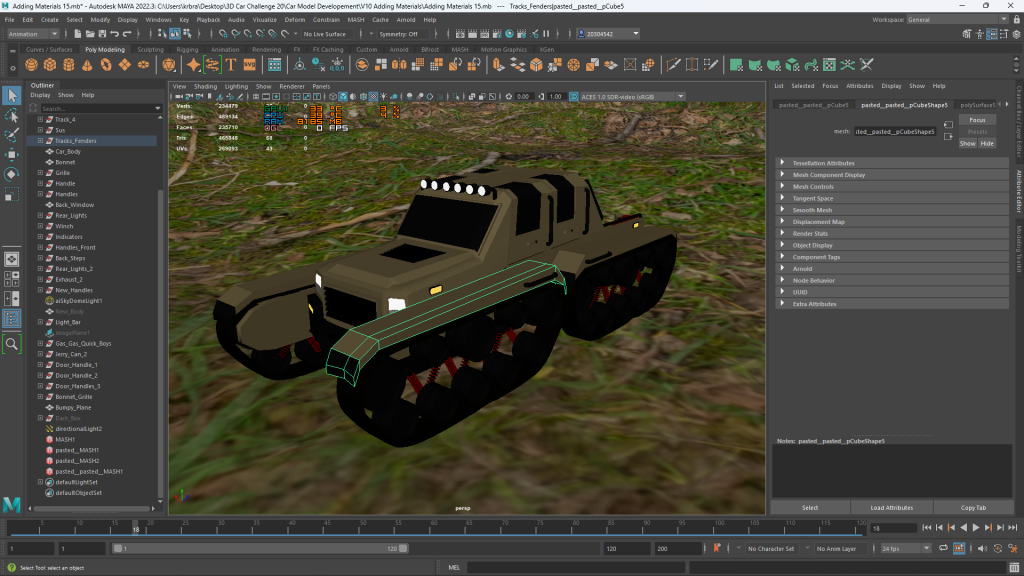
Car Body Progress: 27/11/2022: 11days left


My vehicles purpose:
Now that I have a good idea of what my vehicle is going to look like and what type of vehicle it is. I now know potentially what my vehicle could be for in the real world.
Articulating Tracked Pickup Truck:
This vehicle can be used for travelling off-road in some of the harshest terrain conditions. Whether doing that for a fun activity or going travelling. Being a pickup truck means that you can take plenty of supplies and equipment with you. The large winch at the front will come in handy if the vehicle ever did get stuck or helping another vehicle out.
What I have in mind when I say harsh off-road terrain:

Adding more details:
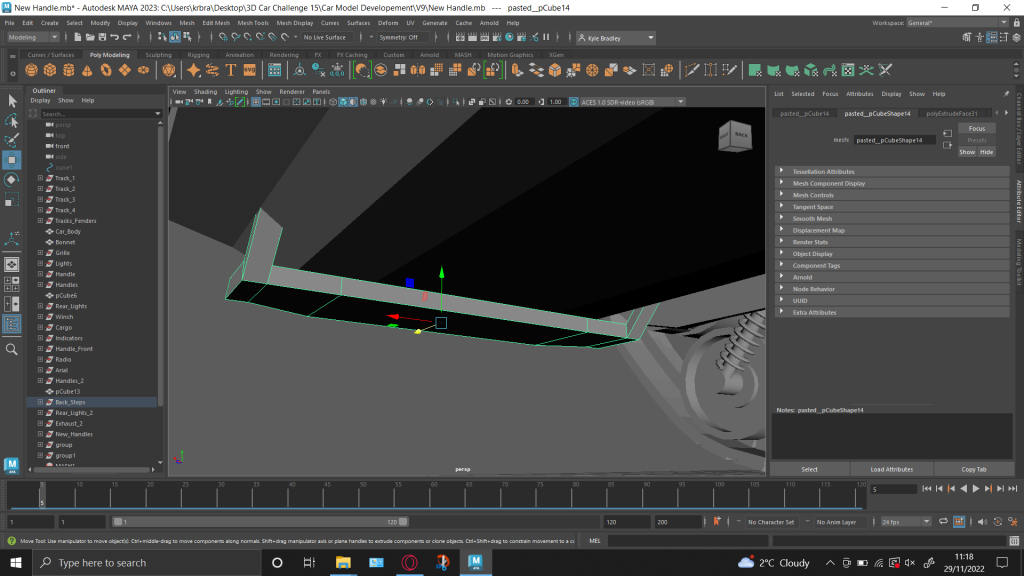
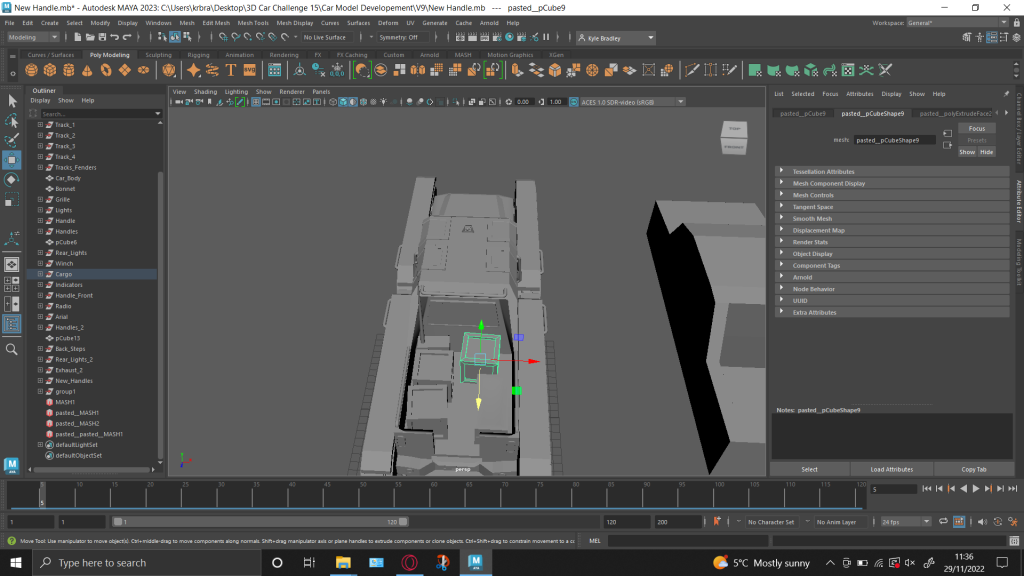
Handles:
Used to tying/ strapping things to. Maybe to attaching a tow rope if the vehicle gets stuck in bad terrain e.g. mud.

Handles on side of track and next to door to grab onto when climbing into the vehicle.

Pickup Truck A bar prevents damage to bodywork when carrying cargo overhead.
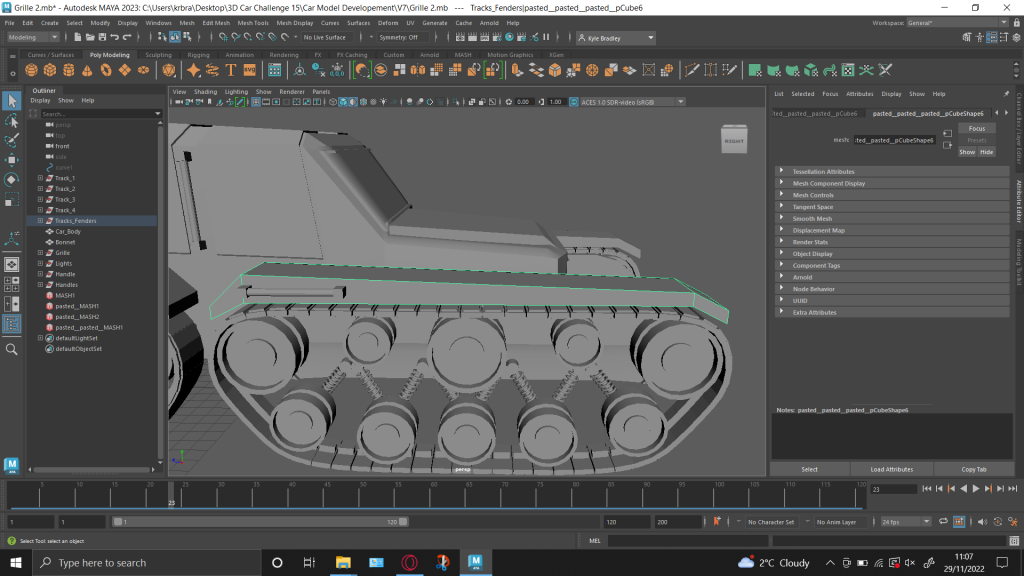
You’ve probably already seen images of this earlier but I changed to the shape of the the fenders above the tracks. The main purpose of these is so that you can climb onto and get over the track but I have also now curved it around the sides of the track a bit. This will act as a sort of mud guard.
At this stage I decided to go ahead and model most/ the rest of the details I wanted to add, below is images/ closeups of the parts I’ve added.
Tow Bar: Front
Used the same technique I used for suspension to create the rope coil.

I still need to add a hook on but will do that later on.
Steps: Back of vehicle
since the base of the vehicle is quite tall it would be quite difficult to get up at the back without a step or ladder so here we go. I have connected the bottom step to the underside of the car.

You can also see the number plate I have extruded from the body of the vehicle. I have made sure that the steps don’t cover up the plate and left sufficient space for viewing it.
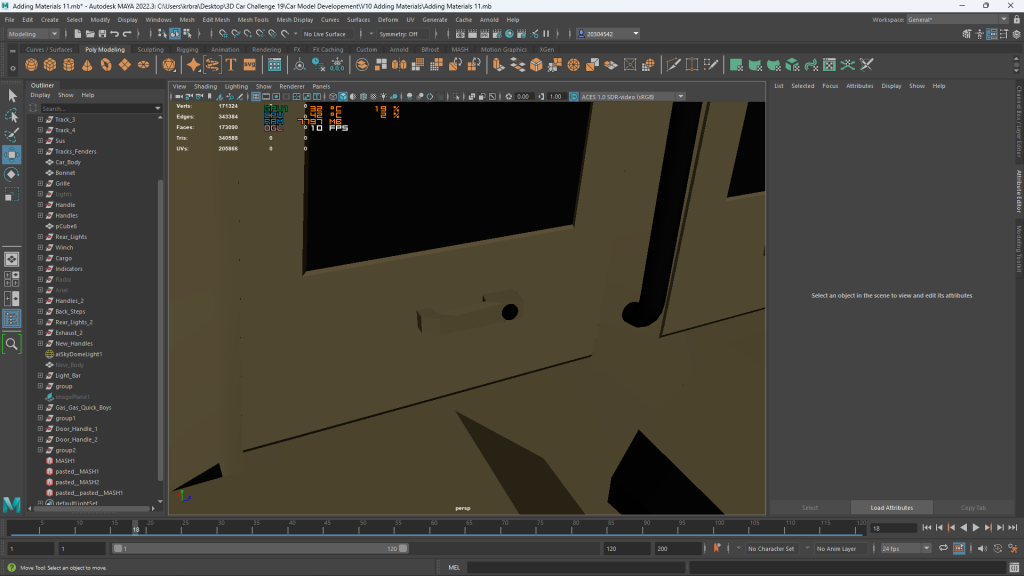
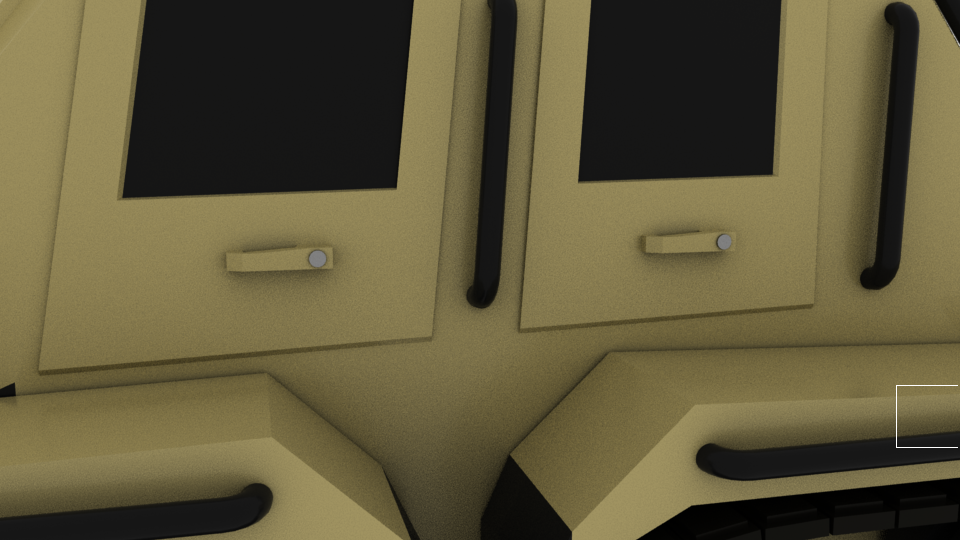
Lights and Grille Detail:
Headlights

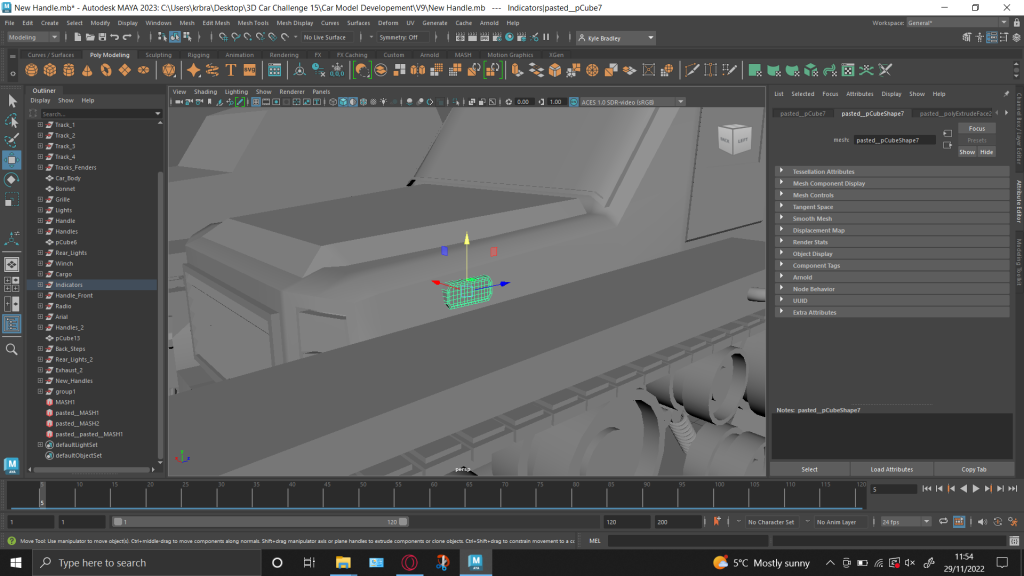
Indicator Lights and more handles (possibly for towing)


Indicator light problem and solution:
Since my vehicle is set back with the tracks poking out at the front if it was to indicate you wouldn’t see the indicator flashing from the side as the track is in the way.
So I have added a additional indicator on the side to solve this.
Back Rear Lights: Indicator/ backlight/ reverse lights.

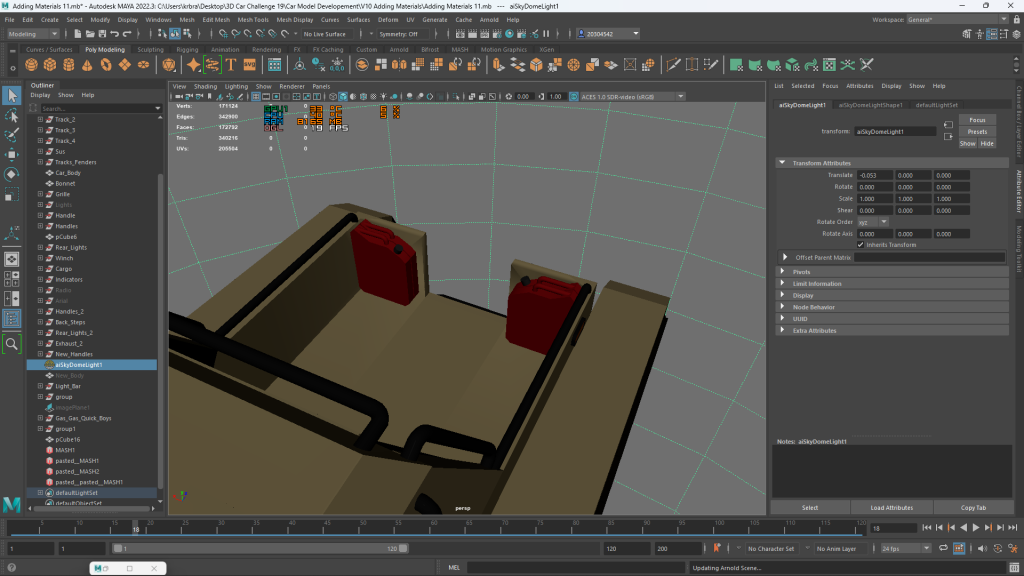
Cargo:
As well as cargo crates you will also see a sort of antenna coming off one the boxes this is going to be a radio.
A military style looking long range radio. Useful for when going long distances off-road for communication. Where you probably wont have that invention called Wi-Fi.
Although I have not modelled in detail on this yet.


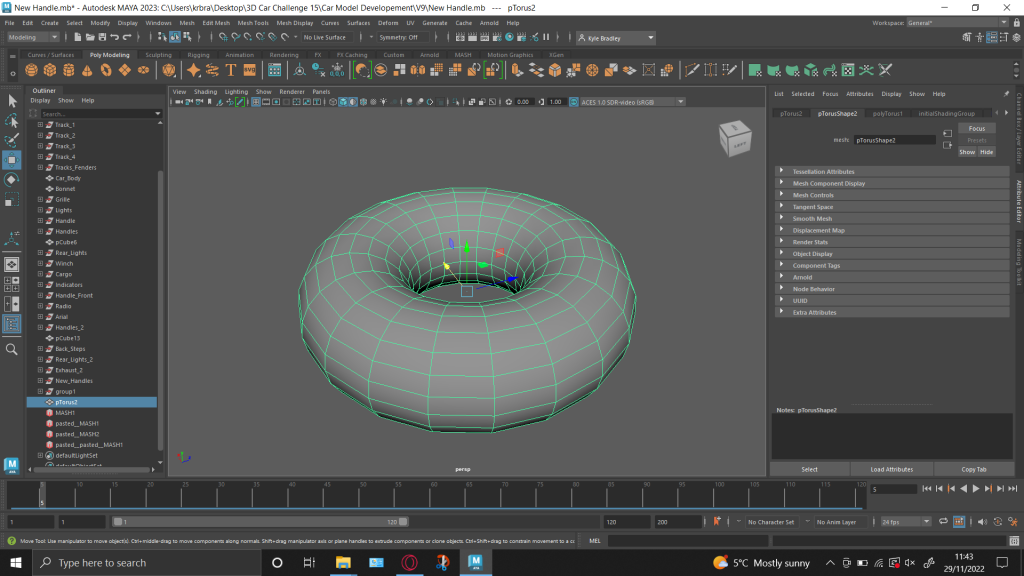
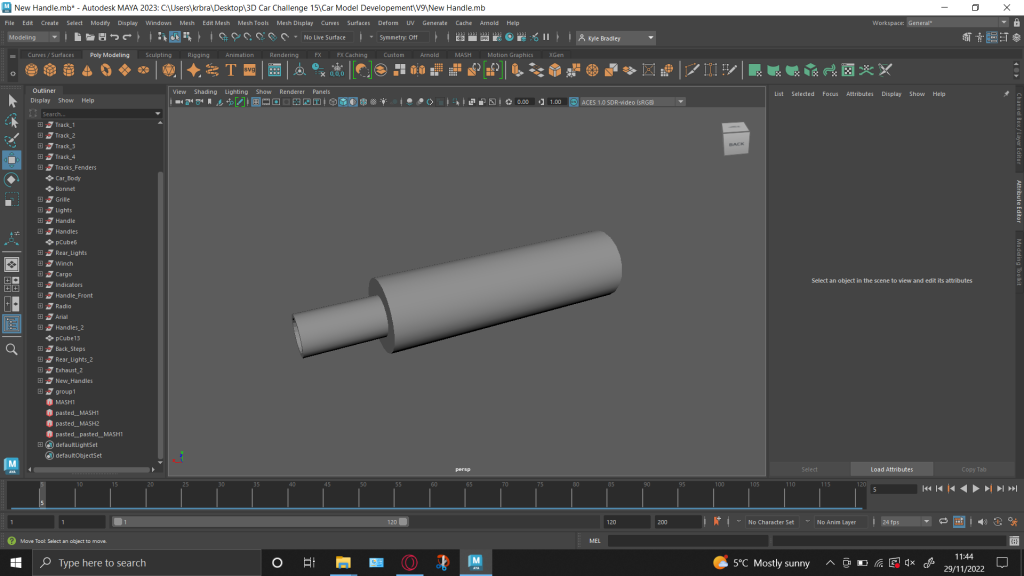
Exhaust:
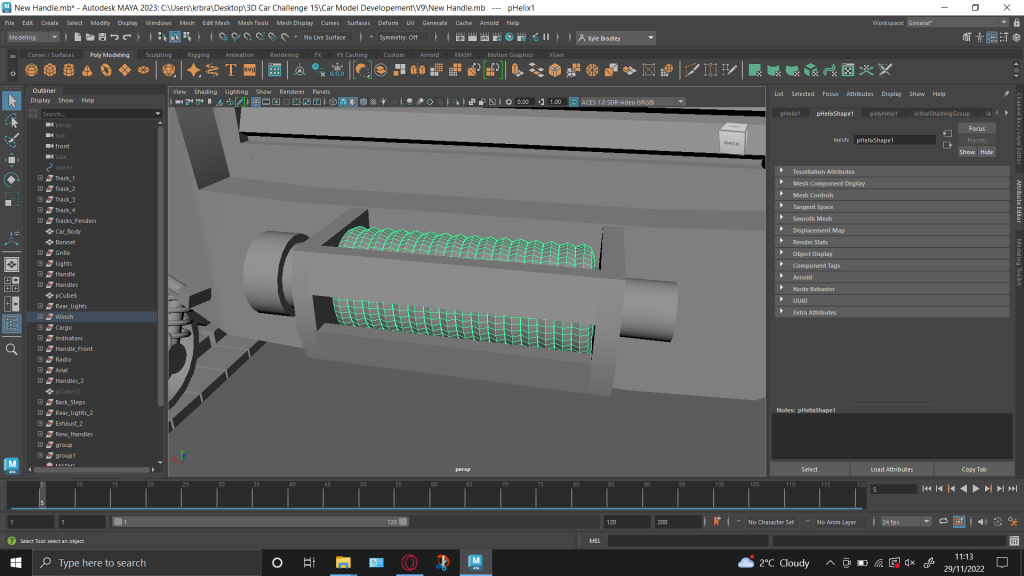
Using a donut like shape to create the piping for the exhaust, this is a new technique I learned to create curves/ bends in a pipe/ tube like shape. I am going to go back and change my handles with this technique as well.


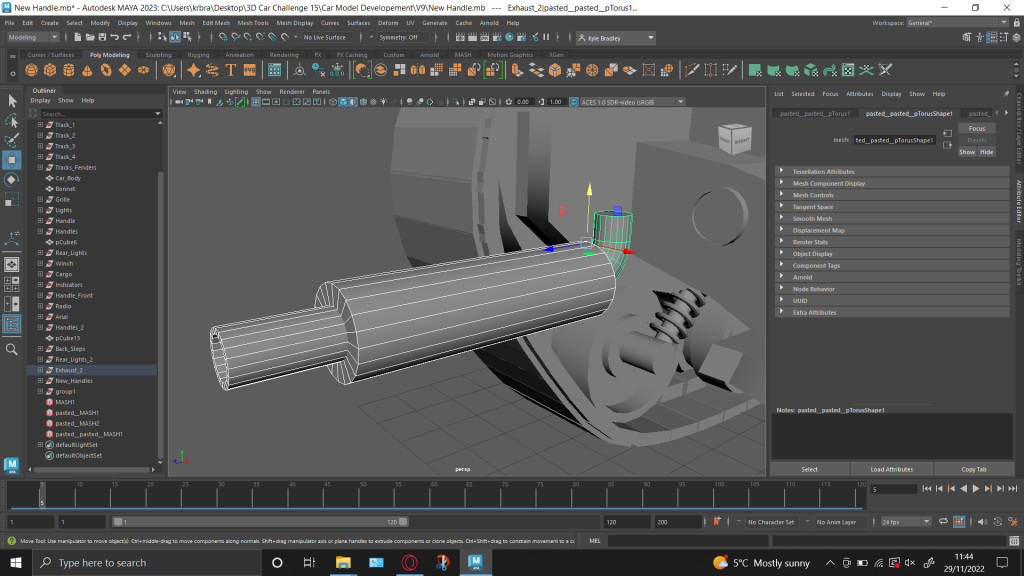

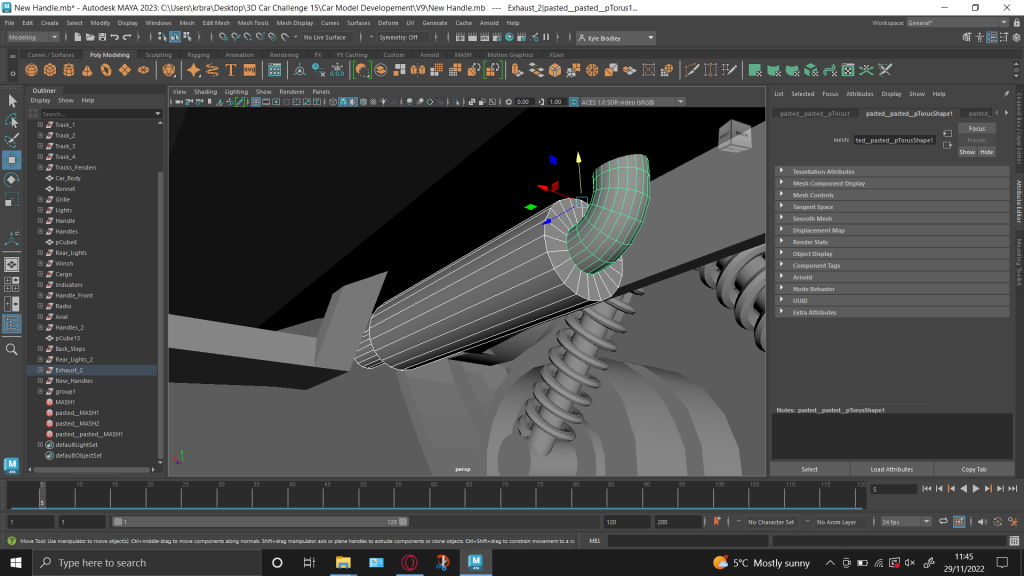

I realise that exhausts in real life go all the way to the front of the car where the engine is.

However I have only modelled the end section of the exhaust as its the only part you will see when its under the vehicle. And there’s other parts I want to move on to make.
Changing/ Updating Handles:
As I mentioned earlier I’ve learned how to make bends in pipes so I changed my handle from the blocky look they had to smooth curved handles.
Before

After

These versions of the handles look much nicer, as the handle flows into the bodywork of the car and blends in with it.
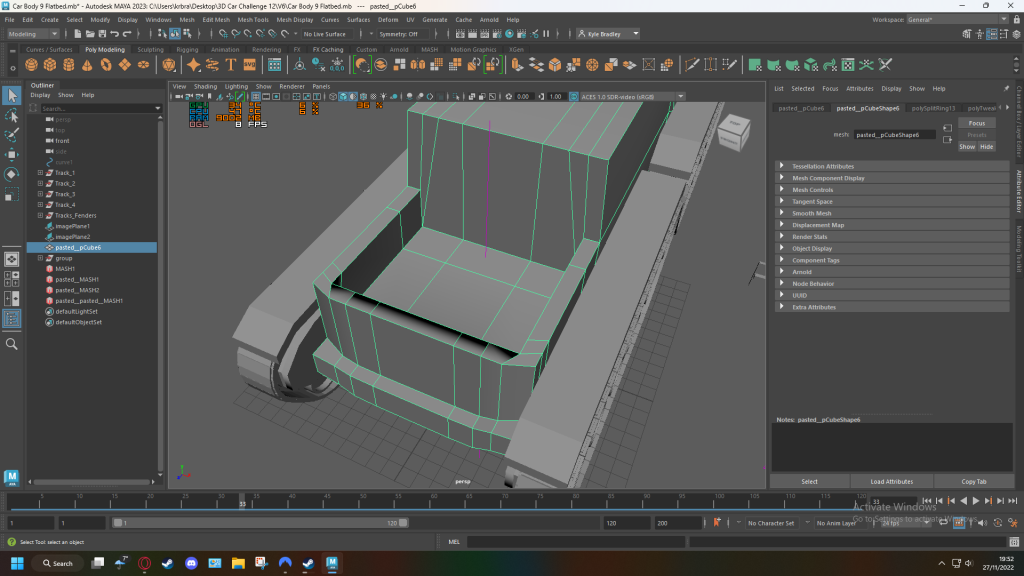
Changing Back Problem and mesh complexity:
On my pickup truck style design I have done an open back but with a slot cut out
But after looking again most pickup trucks have it so that the whole back can open up to allow easier loading.

I have tried to change this in Maya, but the body shape for my car has become quite complicated and has some lets say unique choices in the mesh that you don’t normally want. In the image above you can see triangles, other shapes and lines that are not straight.
The combination of using edge loops, slanting/ sloping areas and making protrusions e.g. the bumper lead to this. I didn’t realise this and I’m not that experienced in using the program. This is making it very difficult to make late adjustments to the main body shape of the vehicle.
I can take this as a learning curve/ thing not to do again in the future. It took me a long time to make the body and do not want to start it again from scratch which is really the only way to properly fix this. Therefore the back will be staying as the way it is, in my opinion its not worth the time to start from scratch just so I can open the back up when there is still lots more that I need to do on this project and the deadline on the 8th of December.
On the bright side the messy mesh doesn’t really effect how the end model is going to look once its rendered it. It just might make things a bit more complicated when it comes to UV mapping.
Doing this project so far has really given me an insight to the huge amount of time and effort that goes into creating 3d models for movies/ film/ game etc. It is very time consuming and can often be quite finnicky, but still I am enjoying this project so far.
UV Mapping:
Not got round to this yet (only needed if I’m going to add custom textures later on) Can be quite complicated to do.
Update: I’ve opted to a cartoonish low poly style look to my car and background so UV mapping isn’t really necessary at the moment.
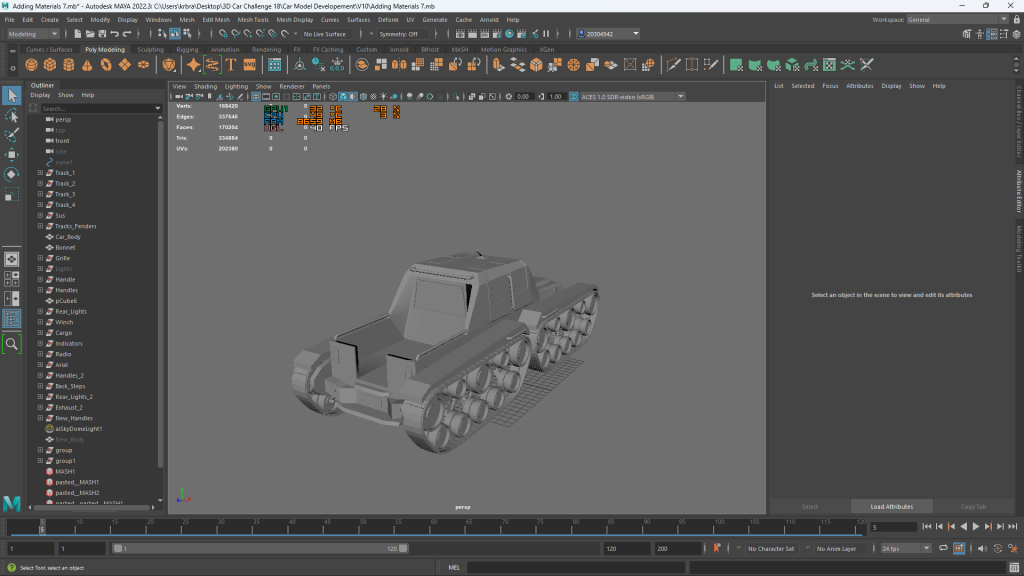
Adding Materials:
I could carry on adding details to the vehicle for ages, but with a deadline in mind I need to begin adding some colour and prepping the model for image taking.
Progress Before I add Colour:
You may have noticed I have removed the cargo in the back.
This is because I would rather focus on the vehicle itself before adding extras.
I have also added more handles to the back so that it looks like an A-bar section on a pickup truck:
A-Bar pickup Truck
An A-bar protects the body of the vehicle when carrying cargo.


Colour:
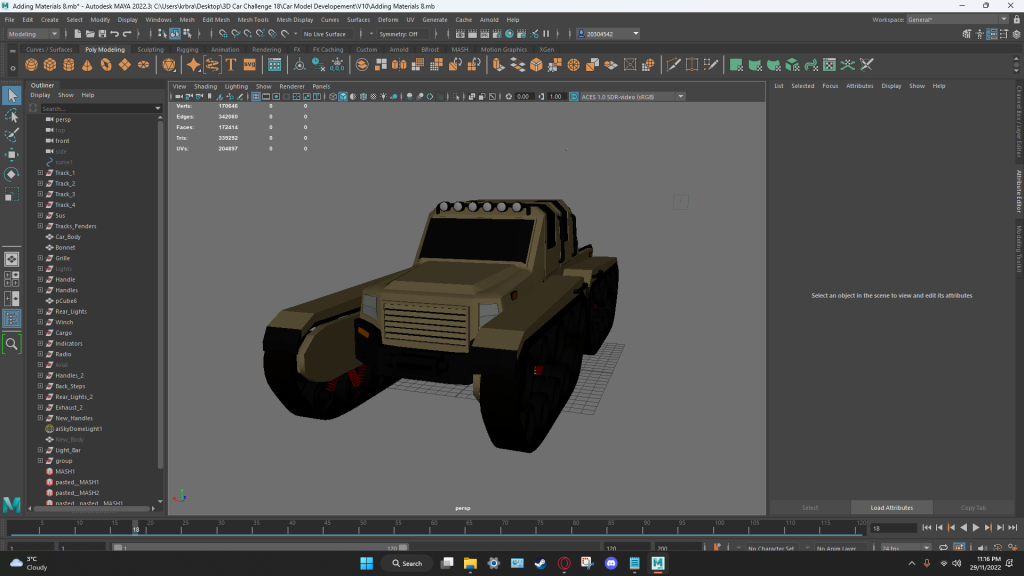

Render Test:

I’ve gone for beige as my primary body colour for the car, I didn’t want to use something to bright neither to dark. Beige is a good inbetweener. Using a colour like this one will help allow other parts pop and stand out on the vehicle. Such as the winch metal, headlights, suspension springs etc.
So far I am really liking the polygonic, simplistic abstract look to my vehicle.
I have also added more handles around the vehicle, a light bar and mud guard flaps (you can see them at the front of the track fender)
Other things left to model/ that I want to add.
- Fuel Jerry Can. Done
- New Antenna/ Radio (other one was a bit basic)
- Winch Hook. Done
- Door Handles. Done
- Mirrors. Done
- Bonnet Detailing. Done
- Cargo in back (maybe?)
- Paint job detail adding custom made textures e.g. scratches (again time dependant) – Going to add custom texture to number plate.
- Lighting Setup. Done
- Fix Track Animation (Broke it somehow, this isn’t necessary for the brief however) Kind of fixed.
For my environment I think I would rather use a simple background and have most of the emphasis on the scene of the vehicle. Perhaps a darkish background then I can illuminate areas with lights coming from the car. Or maybe the odd street lamp with the car beneath it.
Jerry Can:
I got a side and front view image and used to it to create the shape of the can. I reused my handle but chopped the end of. I also learned a new feature called bevel edges which allows you to curve off edges, though it appears to only work on simple shapes such as a box, so I had to add edges before creating the shape of the can.
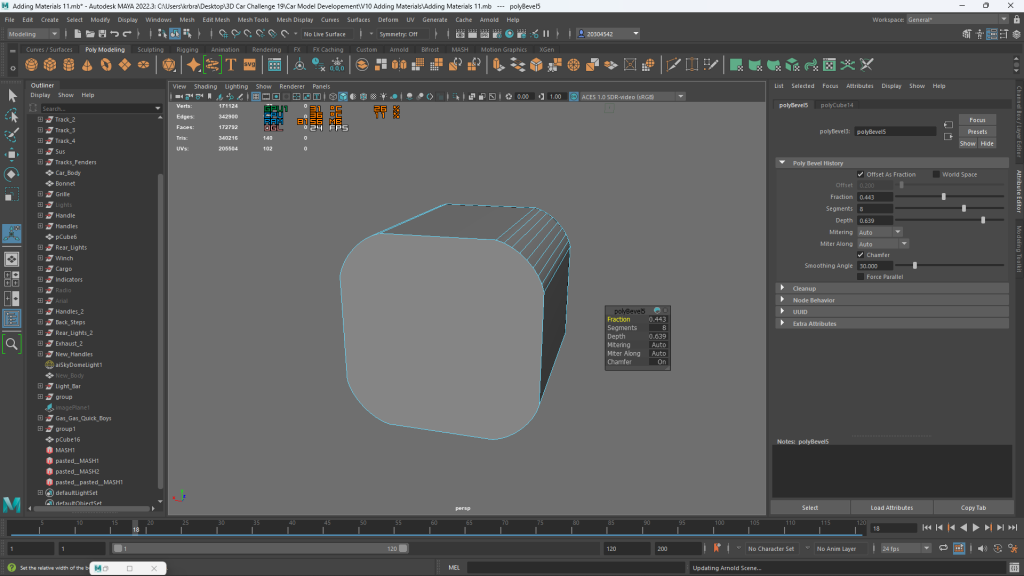
You can completely round of edges with this feature though I decided not to with my can as I want to go for a simplistic polygonic look.
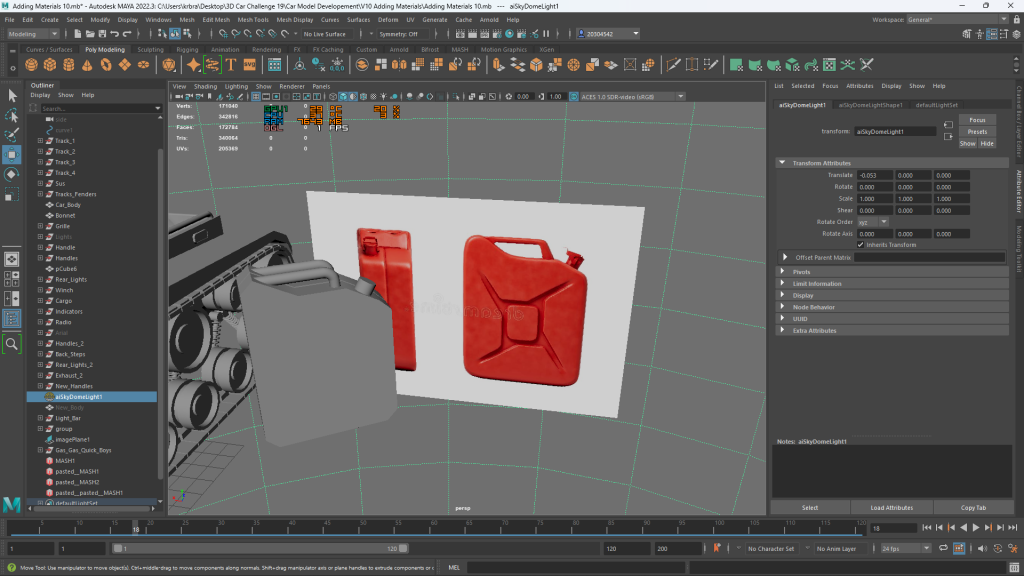
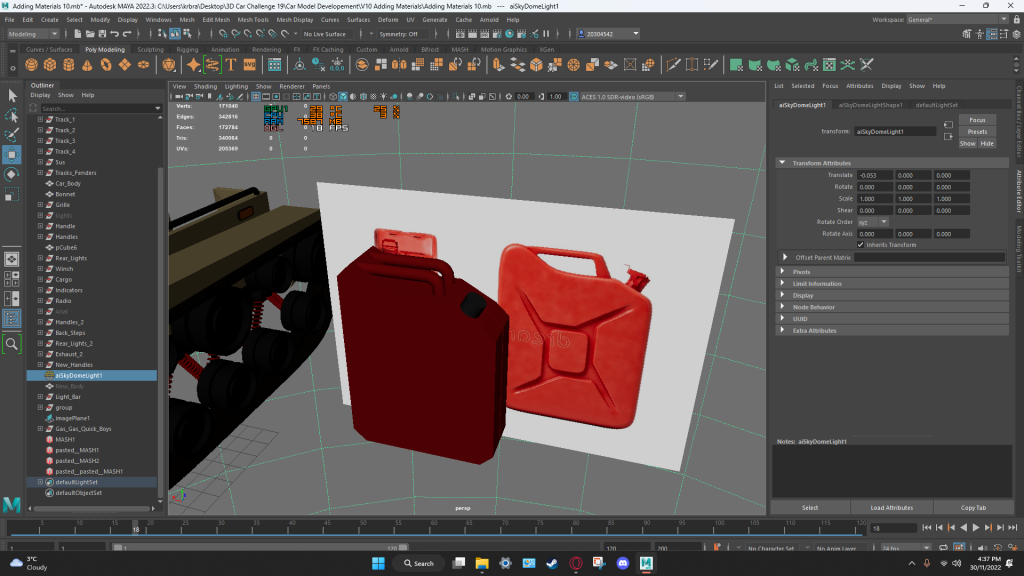
I would also like to add the X shape in the middle but at the moment have no idea how to. I will come back to this at the end and when Ive learned how to do this.
Door Handle:
Rendered Scene So far:
Here I’ve setup some lighting with a darkish box area around my vehicle, I did consider making some hilly terrain which I tried out, however I’ve decided to go for a simplistic background as it matches the style of my vehicle. Making and putting a realistic looking style background with my vehicle would only work well if my vehicle also looked realistic. However trying to make a fully realistic looking vehicle model and background in the time span I have available for this brief when I started it is not really an achievable goal. (Just over 3 week)
I’m not saying it would of been impossible, but with my current level of maya knowledge and skills I wouldn’t of been able to do it. Before this project the most complicated thing I had made in maya was basically a box with a handle and some drawers. However I am constantly picking up and learning new skills and techniques whilst using the program.
Update: /06/12/2022 Ignore the text above: In the end I decided to create a low poly background, and challenge what I could and couldn’t do.
(Terrain Experiment Further Down)

Example of what I mean when I say realistic:

Hilly Terrain Test:
A new process I have learned is that you can create terrain essentially by making a plane and increasing the sub divisions (The boxes you can see) which allows you to create terrain using the various sculpting tools in the sculpting menu.

There is also custom brushes available which is what I used to make this terrain.
I then tried applying a custom texture to it which I had downloaded.

The texture needs resizing, however the realistic appearance is vastly different to the appearance of the car I’m working on.
And as you can see then background and the car just don’t work together, as one is much more realistic where as the other is more simplistic. The styles don’t match and conflict. Therefore I don’t think I will be using the terrain feature in my end product. However I’m glad I tried this out and its one more thing I know how to do now.
As a side note it also very slow to render with this background and making Maya crash. But is expected with a textured complex object with over 1000 sub divisions. More subdivisions means more detail. It makes it so its not as jagged or boxy looking. I’m only running this on a Quad core processor, More cores = faster rendering. It could be something I might look at upgrading at some point.
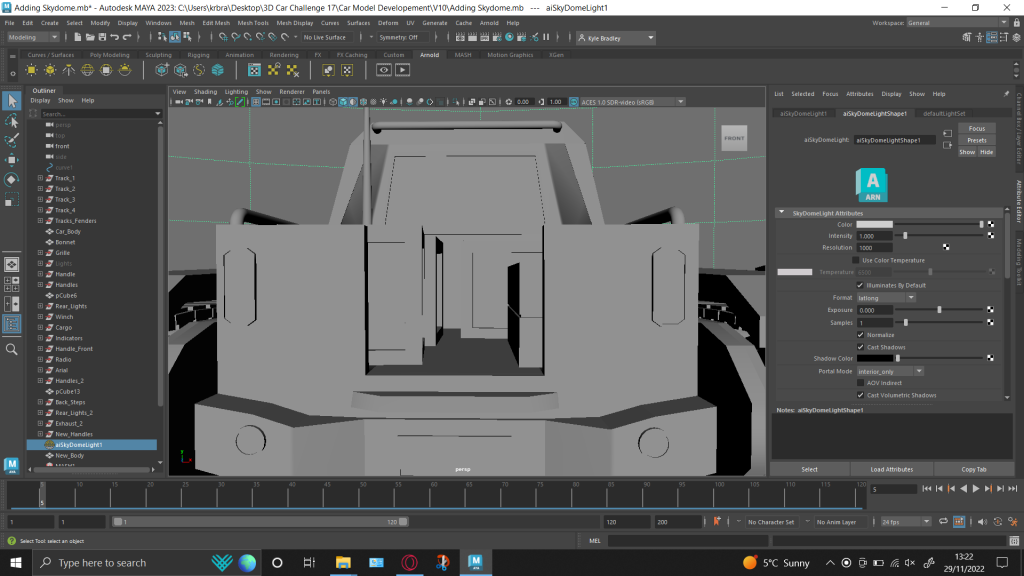
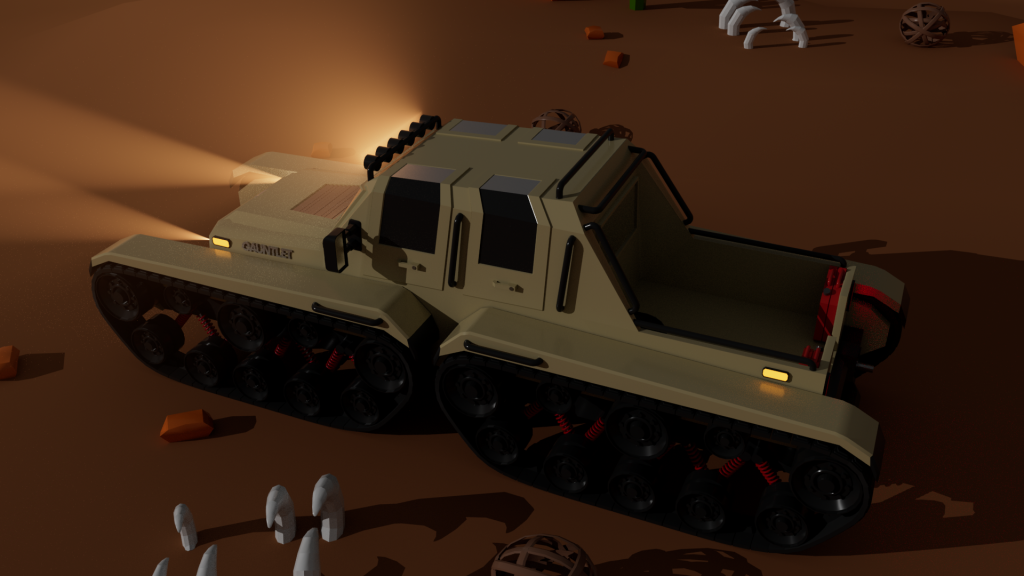
Light Glow:
Learning how and adding glowing effects to lights on my vehicle.

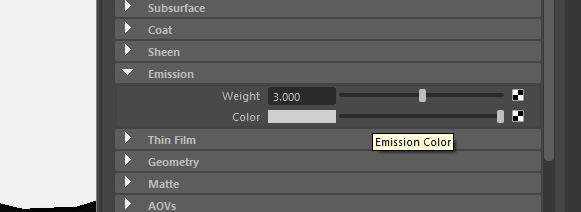
Increasing the emission on the material (ai standard surface) makes it so that the colour shines and has a glow effect to it.
The glowing effect really allows the lights to pop and bring out their vibrant colour. The use a darker background also contributes to this as well.
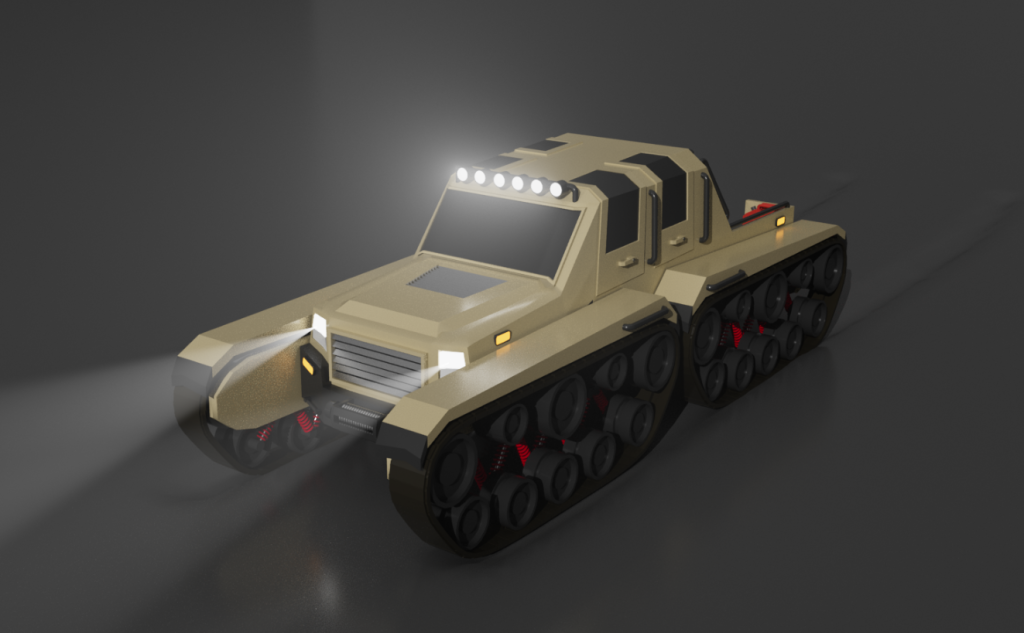
Headlight Lighting:
I used spotlights with a fog effect to get the cones on the headlights you can see below:


Was a bit of complicated process, where I had to add a hidden feature in the render settings, called ai atmosphere fog which allows you to see the light cones. But it creates a very nice effect with the lights. You are also able to adjust the expose and intensity of the lights.
Update 01/12/2022: Also added it to the lights on the light bar now. Used an area light instead of spotlight. I don’t want too many light cones on the front, otherwise it would look to messy. However this still gives the effect of luminating light forwards.
Track Deformation:
Added a bit of an indentation to the ground where the tracks would have run over, using the sculpting tools I learned earlier.

Wing Mirrors:
I used the bevel edges tool to create the sloped corners on the mirror and bars holding it in place.

I even managed to get the material on the mirror section working like a mirror, using a option called thin film on the material sections I discovered. As you can see it is reflecting part of the vehicle from this point of view in the image below.

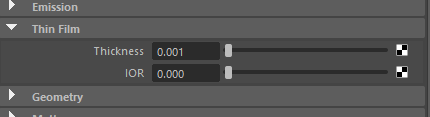
Using this same method I’ve also added a bit of a shine to the windows. Since I’m not modelling the interior I need a material that looks like glass but without the transparency, this seems to work quite well.
As you can see Its added a bit of reflection where the windows are.
I could potentially use this on the body of the car as well or just a shiny material, but I myself prefer matte style paint jobs. Matte colours have this sense of minimalistic/ abstract feel to them which I like.
Winch Hook:
The first hook I tried making didn’t turn out very well. I tried extruding surfaces to match the shape of the image of this hook, In the end the mesh and lines are all over the place, and all different sizes and shapes, not good.


Second Attempt: Rather than using the image and extruding surfaces in the shape of it, I instead created a basic hook shape, then using edge bevelling I sloped the corners, some more than others. Edge bevelling essentially rounds off the corners and you can change how smooth it is and how long the edge is.


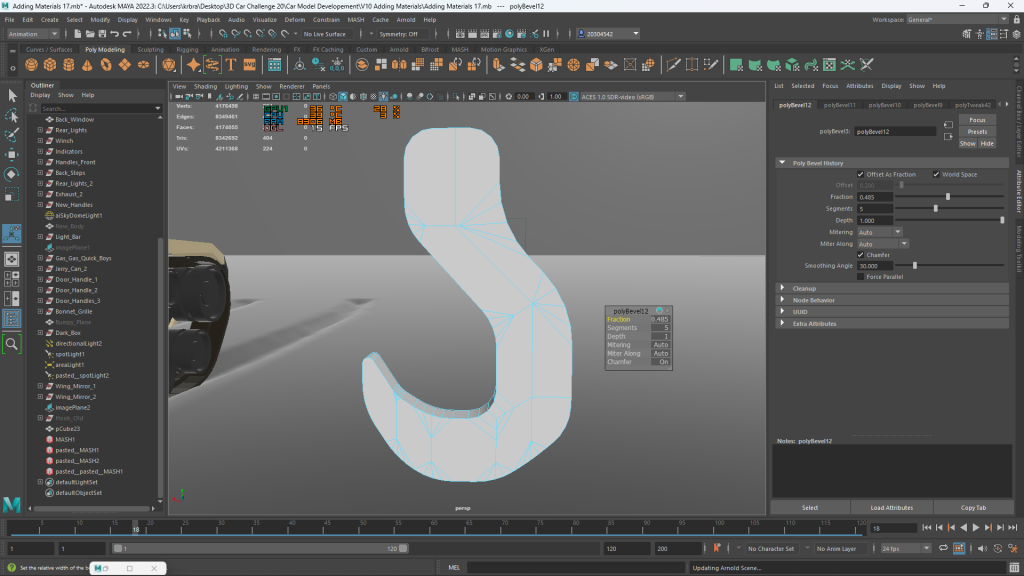

Still needs a few more details on the hook, e.g. the clasp but its getting there. Much better than my first version.
Improvement:
As I’m getting better and learning more features I’m going back and improving the detail/ modelling on some areas that I had done earlier. Such as this
Here I’ve rounded of the corners of the fenders so there no longer as blocky like.

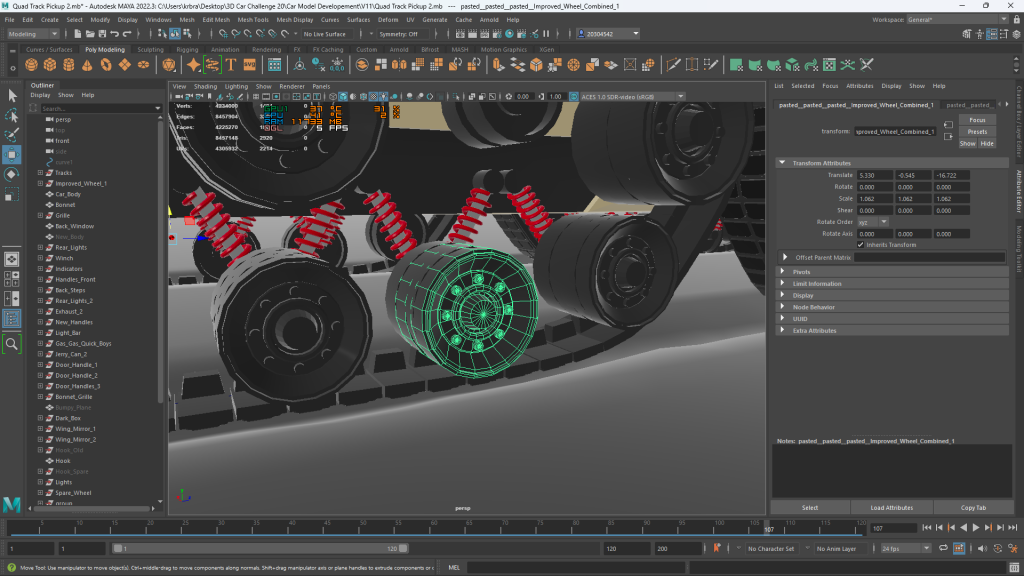
Track Upgrade:
Here I’m improving the detail on the track by adding tread. I’m replacing the old track with the improved model, as a result I’ve also been able to fix the track animation.
Some References I looked at:


Before:

After:

I might need to adjust the colours a bit so its a bit more visible for the final version, but adding treads has brought it more to life and its no longer flat/ boring.
A lot of tracked vehicle use metal pieces for their track, however since this isn’t a heavy vehicle such as the ones that do use metal tracks e.g. a tank, I’ve used a rubber like material instead. Rubber means it wont cause damage to a road if this vehicle ever went on a road.
02/12/2022: 6 Days to go. I feel like I’ve reached a stage now where the majority of the vehicle is done and I’m mainly just adding detail and trying to fancy it up more.
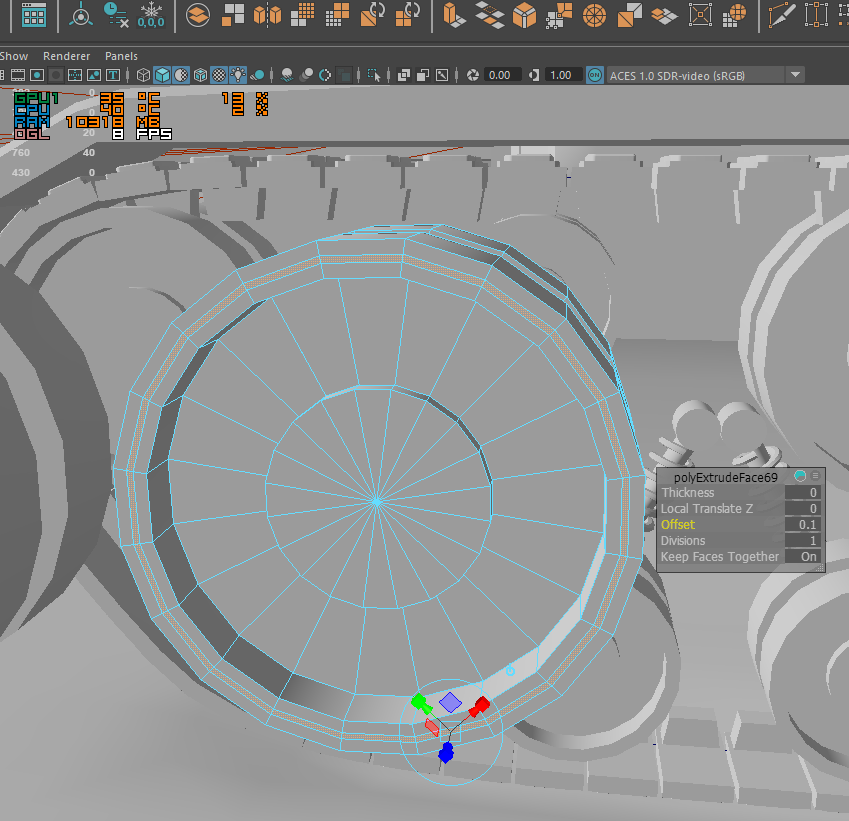
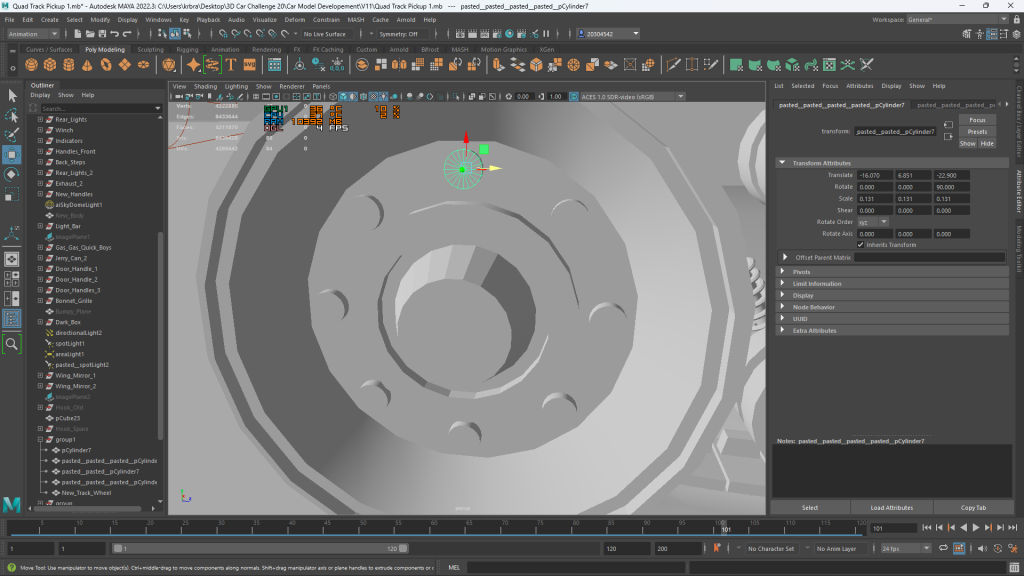
Improved Wheels:
I’ve gone back and improved the level of detail significantly on the wheels using the various techniques and skills I’ve picked up during the project. I extruded the faces to make the rings and circle coming out and then bevelled the edges.
Some References: Looking at just the wheel part now.

I’m going to continue improving the detail until I run out of time on this project, I may go back to the background as well.
Before:

Now:


The new wheels look much improved and has more of the features seen on a real wheel, as opposed to my first very basic version.
New Terrain:
02/12/2022
After checking the brief again, I found out that simple one colour backgrounds are not allowed. This is why its important to double check your brief. Ill remember this for my next project. But not to worry, I’ve still got a decent amount of time left.

I wanted to do a one dark colour background as the contrast really allows the colours and detail of the vehicle to show, and then I could primarily focus on adding more detail to the vehicle, but ill have to put that on hold for now.
Earlier I said that A realistic style background wouldn’t work as it would not match the style of my vehicle.
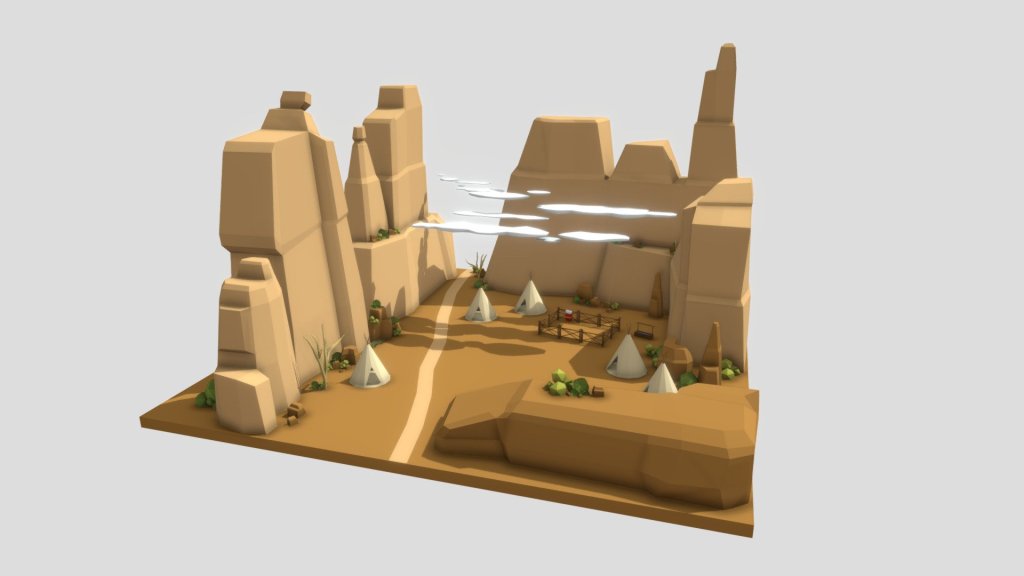
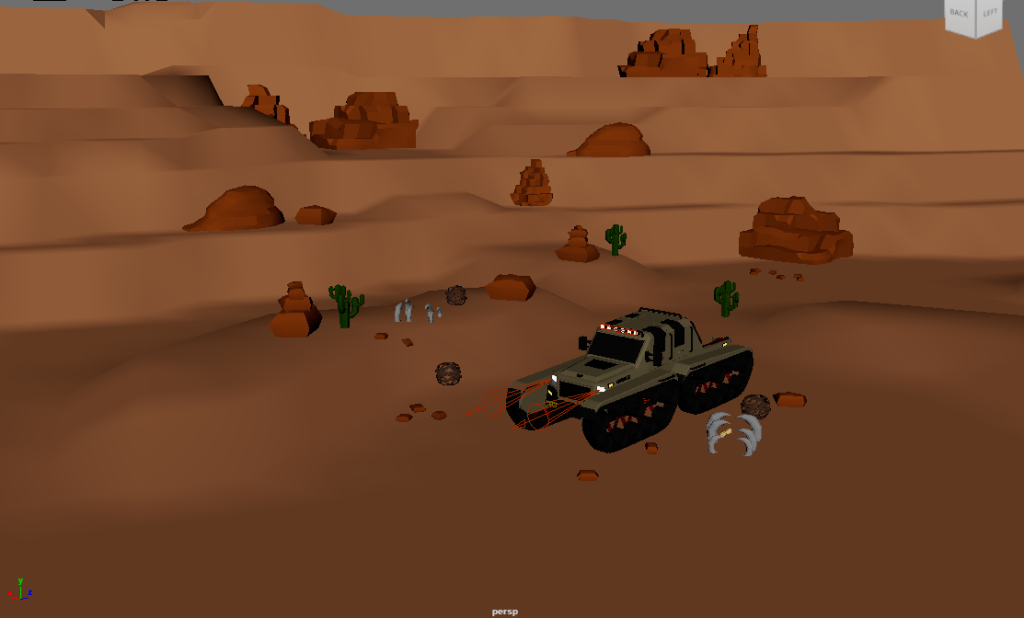
So I’ve decided to create a low poly style desert/ canyon background. I’m going to use a desert/ canyon as its an offroad terrain and will emphasise my vehicles off-roading capability. And the colours of a this type of terrain will also work well with the current colour of my car.
Low Poly style is a type of 3D design which utilises meshes with a lower amount of vertices/ faces to give objects a polygonal style look.
You can make something that would normally look realistic and give it this abstract, cartoony look to it.
E.g.
Realistic bush:

Low Poly Bush:
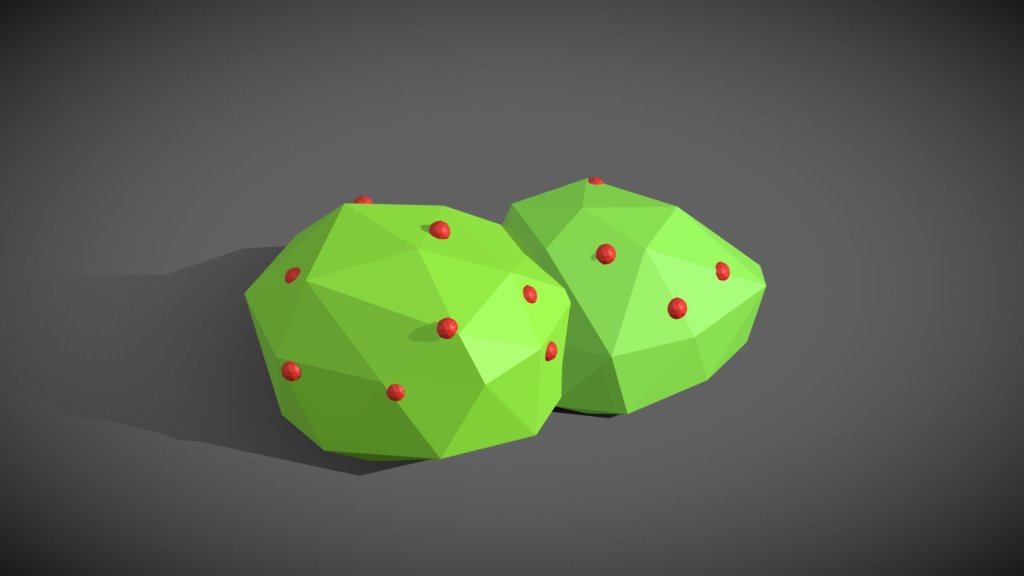
With the right use of colours and contrast you can make something look quite nice.
You often see this art style being used in projects that are made solo, due to the fact that it reduces the time to make something drastically. However you can still make really nice looking objects. The non realistic appeal/ look is what appeals to me. Since we always view the world around us in the way we do. When you have objects like this that abstract and simplify things it just has completely unique/ different feel to it.

If I say was to go down the realistic route I could easily find myself spending several hours or the day just making a single detailed bush. 3D modelling can take ages to do and considering how there still a numerous amount of things I need to do I don’t have the time available left for this brief to do that.
Other examples of low poly:


Quick side note: The brief does state you can download and use background assets, however I want to make my own. Its makes good practice and I want to learn how to do it.
Terrain Development:
low Poly Desert Examples:


I started off with a plane with 50×50 subdivisions, then I’m raising and bevelling different areas.


I’m not going to detail the whole terrain/ plane since I’m only going to need one 1 side for the camera angle when taking images of my finished vehicle model. I have raised sections up in the back so that you will be able to see objects that I am going to make, despite the car being in the way at the front.
Making terrain assets:

Cacti:
Here I curved and manipulated the first bit of cactus I made with the vertices to create this bit of cactus branching of.

The result an abstract cartoony looking cactus that matches the polygonic style of my vehicle.
Rocks:


Used an option here that I learned which allows you to re mash a mesh to custom amount of divisions. Its add a level of randomness to the shape which is what I want here, its a rock there not perfect and come in all different shapes and sizes. I can also adjust the position of each vertex individually to add even more randomness.

I’ve given my rock a orange colour thats a bit darker than the rest of the desert so that you can differentiate between the two.
As well as this canyons have this orange colour themselves in real the world.
It gives the rocks a sort of baked/ scorched look, since its a desert its going to be very hot.

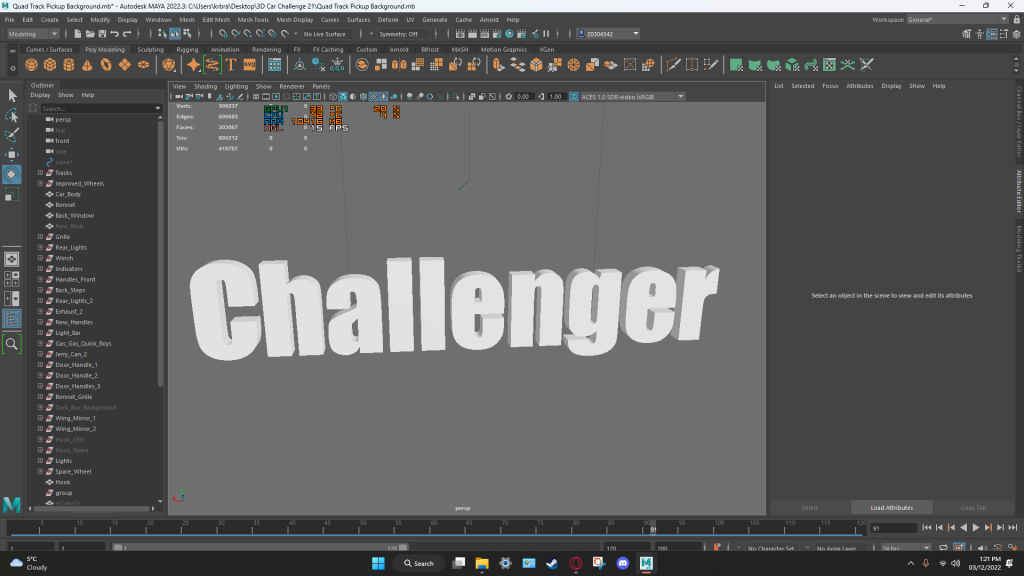
Car Text/ Logotype.
Here I’m wanting to add some text to the side of my vehicle just how some named cars do in real life. This text often tells you something about the car. E.g. 4 wheel drive
E.g.
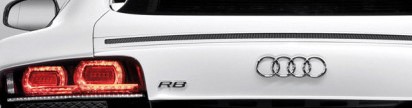
R8 on a Audi

GTI on a Volkswagen
GTI stands for Grand Touring Injection, a direct fuel injection system used on Volkswagen vehicles
I’m going to use the name Challenger, for my vehicles name. My vehicle is meant to be an extreme off-roading vehicle capable of handling the harshest of terrains. The name Challenger suggests how this vehicle is up for the challenge, its going to tests its limits to the max.
Typeface Choice:
I’ve selected the typeface: “Glitch Doctor” downloaded from Da font. It has large bulky capital letters, almost aggressive looking. This is to try and reflect the impression of: “This vehicle isn’t messing around, nothings going to stop it, this vehicle means business and its not going to stop until it gets the job done”.
The glitchy effect also adds a nice touch, I know its supposed to be a computer glitch effect however, in the case of being used with a vehicle. It can suggest movement, travelling.
Also in a way it can also add emphasis to how its an offroad vehicle, it kind of also has the look of it being dirty, muddy and a bit messy. Which is going to be the case if your going offroad.
I also considered using the font “Impact”. Its Definitely on my list of fonts I like, however I like the font “Glitch Doctor” is squarer and has straight edges, it has a meaner feel to it. As opposed to impact with its innocent soft rounded corners on some of the letters.
Impact:
Glitch Doctor:


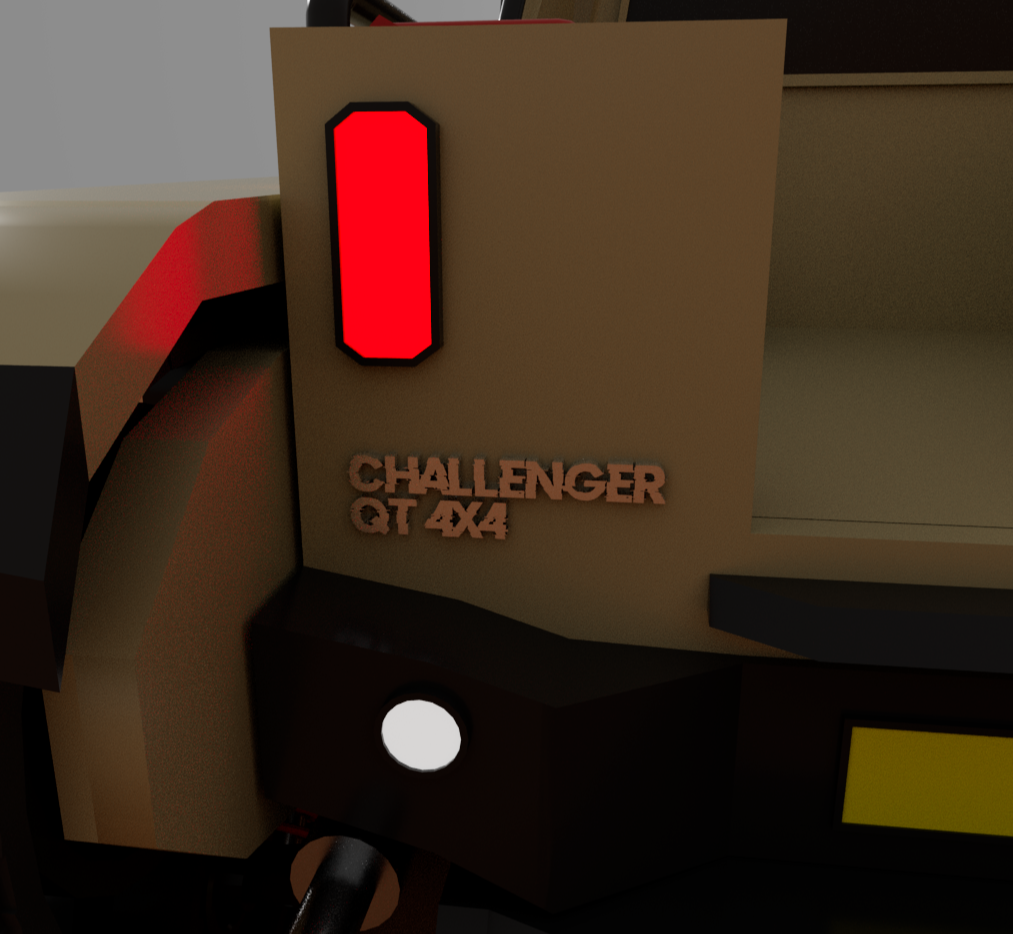
Back of the vehicle, shadows in the way so its a bit darker. On the back section I’ve included a 4×4 meaning four wheel drive. It has 4 tracks that are individually connected. And the QT bit, sounds a bit like GT from ford mustangs/ muscle cars. Stands for Quad Track.
In these images above that I’ve now rendered, I have noticed that the glass on the car is now a bit too shiny, I think this is a result of having a lighter coloured background, as opposed to black before. I will change this for my final renders.
With the metallic material I added to the text. It actually looks nicer in a darker/ shadowed area, with light from the back light reflecting of the surface.
Update 04/12/2022:
I’ve changed the vehicles name to “Gauntlet” as the name “Challenger” is already used by the car “Dodge Challenger” and “Challenger” British Tank.
The new name Gauntlet is still fitting for my vehicle when you think about right down to its core elements.
A gauntlet is a piece of Armor worn like a glove to protect the hand.
The human hand is an incredible feat of complex engineering. Which has been exquisitely evolved to manipulate objects with high precision and allows us to complete a range of tasks no other creature on the planet could do. Without hands in terms of technology and advances I don’t think we would of come even close to where we are today.
By giving my vehicle a name that refers to the hand, it is suggesting how good and how very capable this vehicle is of handling all situations that it is thrown into.
The word “Gauntlet” can be known to used in the phrase “throw down the gauntlet”. This phrase means to to challenge or confront someone. Once again this is referring to how my vehicle is up to the challenge, similar to what I said earlier when I was using the other name.

Some of my images further down still have the old name. I changed the name after I already did some of the stuff further down.
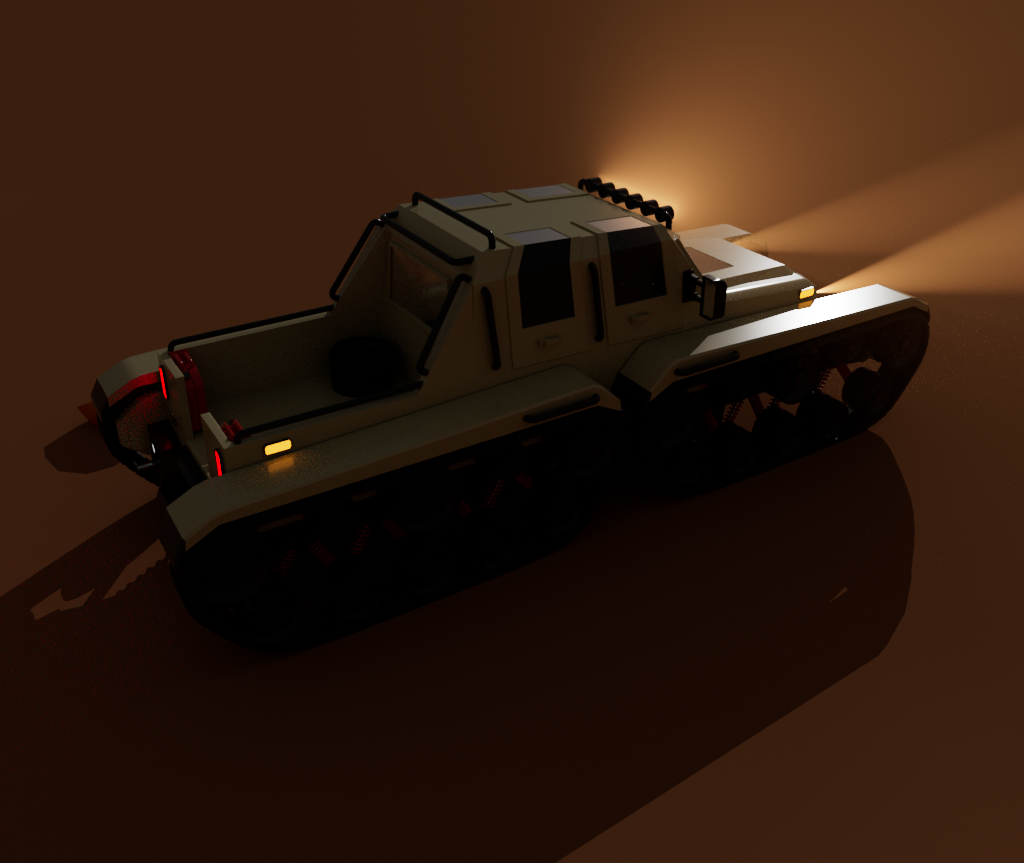
Rendered WIP Image:
(Older Image, still using old name)

I need to adjust the lighting so its a bit darker. I want the headlights turned on as they give of a nice luminous effect. But if its day it doesn’t really make sense why the lights are turned on.
Regarding the indicators:
I have them luminating light at the moment, in reality indicators aren’t going to be turned on unless your turning, however for the purposes of my rendered image, having them glow makes them stand out more and adds some nice reflections on the body of the vehicle. This is more an aesthetic choice than functional one in this case.
Tumbleweed:


The background is starting to come together I think I may just need some larger rocks further in the back where it starts sloping upwards, its looking a bit barren in that area. Or maybe I could add some bones, to introduce another colour.
Bones:
I’m going to go for something that looks like a ribcage from an animal.


Just need a couple of object furthers in the distance and then I think it will be done.
Where there’s bones it means death. If there’s bones left over from animals, it suggests this is not a safe place to be/ you are in a dangerous area. Whether that be predators, or the environment. By having my vehicle showcased in a harsh environment. It adds emphasis of how my vehicle is designed to handle this type of stuff.
When it comes to making objects now I feel like I’m getting pretty decent at it now. I’m now able to utilise a wider range of tools available to create a shape I want. For the bones I used the object “Torus” cut sections of, reduced the subdivisions, filled the holes then extruded faces to get the pointy sections on the end.
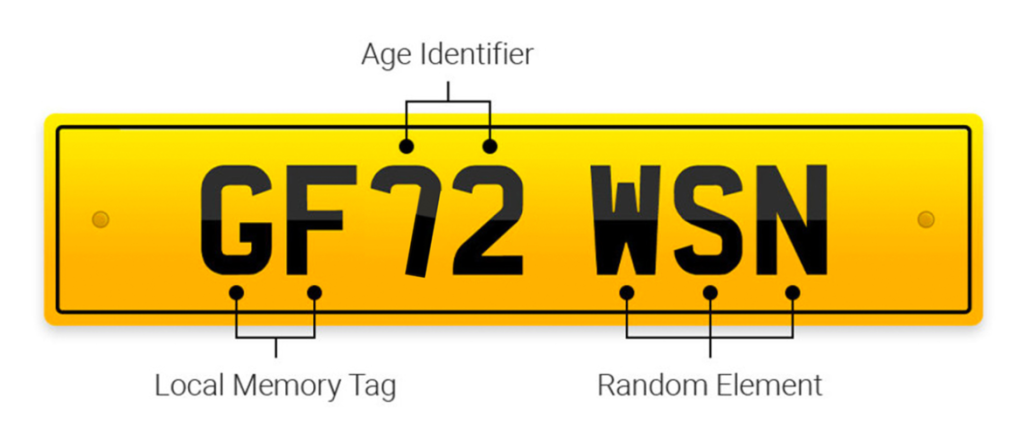
Number Plate:
A guide I looked at to do with UK number plates:
https://www.wilsons.co.uk/blog/number-plate-guide
This helped me to figure out what numbers to put, depending on the year and date.
The number plate I have created below is only fictional, doesn’t exist on any cars I know of. Though the world is very vast so its definitely possible this could be the same as someone else car.

UK number plates use the font “Charles Wright” So that’s what ill use.
I was able to download a similar font from Da font to use on my plate:
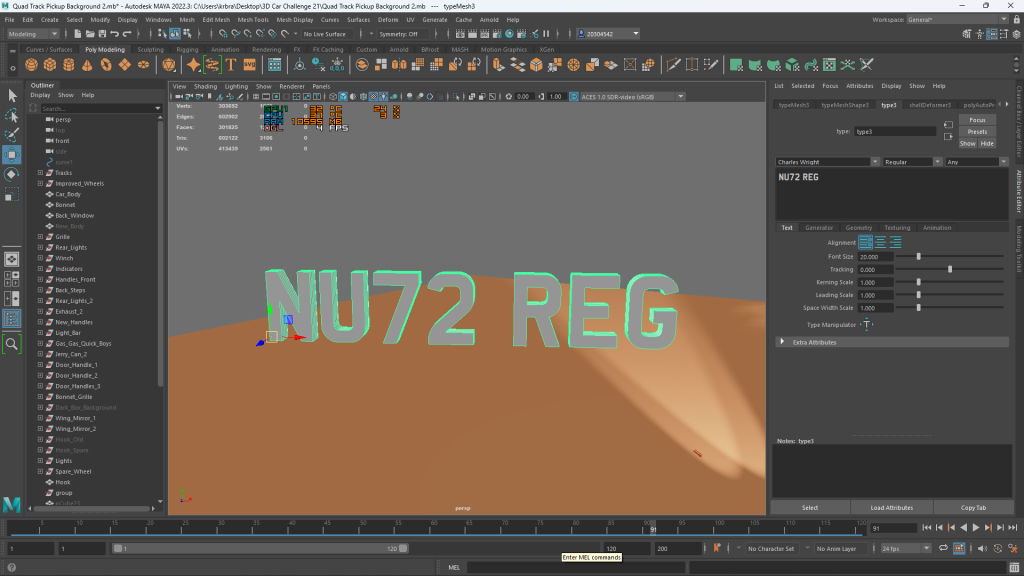
Number Plate (Fictional): MA72 4QT
MA stands for Manchester:
72 is for 2022/23 1st September – End of February
4QT = 4 Quad Track

Update:
It appears that number plates don’t have a number in the last section “Random Element” so I’ve fixed this.
CHL, for Challenger.

Update: Changed number plate to “MA72 KRB” (my initials) adds a bit of a personal touch to my work.
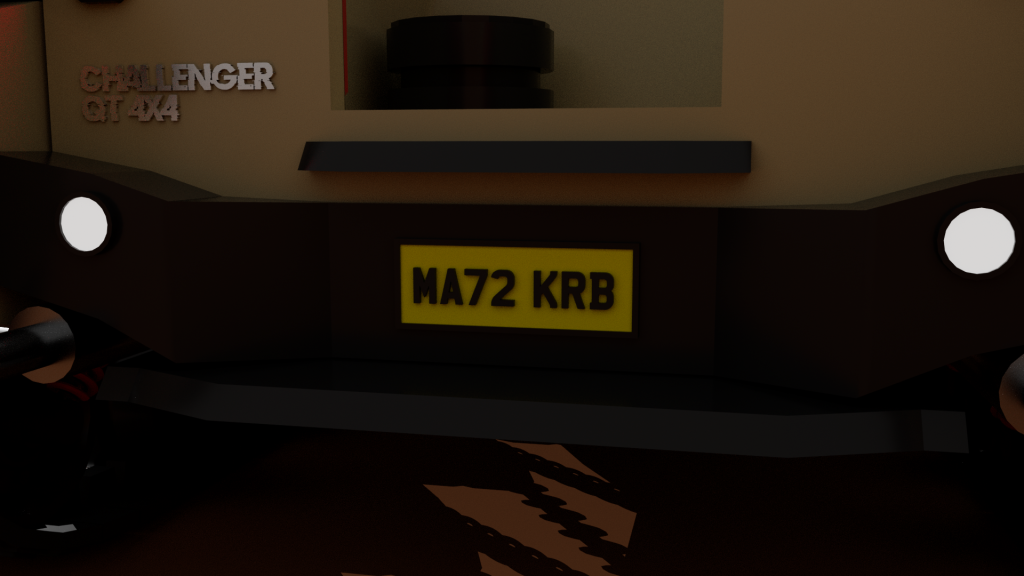
Whilst I could use a totally custom number plate and put pretty much any word I want, I wanted something realistic and akin to the real world.
In the above images you may have also noticed the spare wheel I have put in the back.
Added Frontal Number Plate:

The image above has also now been changed to “MA72 KRB”
Changed Light fog colour:
Here I’ve changed the fog colour which has also effected the colour of the headlights. This gives the lights a more natural feel to them. Its also a warmer look and since this is a desert scene where its going to be hot it works well.

Vehicle Logo Design: (optional part)
I wanted to add some sort of symbol on the front of my vehicle, to try and add some more bits of detail to the body of the car.
The logo needs to be simple and easy to see what’s going on at a distance. I also want it to match the clean, abstract, polygonic style I’ve gone for.
So I’ve had this idea in my head for a while now, the logo can be in the shape of vehicle track. (Sketches after research section)
A logo in this sort of shape will reflect how if there was a company for this car. It would produce civilian track based vehicles.
Car logo and research.

A lot of car logos keep their design simple and easy to recognise by using bold colours and simple shapes.
And in the case of use on cars, there going to moving a lot of the time so your not going to have much time to look at the logo. Therefore something easy to recognise is preferable.
Ill have to keep this in mind when I get to creating my logo after I’ve done some further research.
Car logos that stand out and appeal to me more:
When it comes to logos I really like ones that have a hidden meaning behind them, that you might not initially recognise, or realise if you don’t know about the company.
BMW Logo:
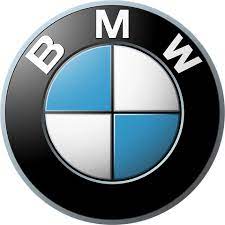
With the BMW logo the symbol in the middle is meant to look like a plane propeller, the white I believe represents the clouds and the blue represents the sky. BMW once had a leading position in aeroplane engine technology during WW2. However since the war they have ceased production of aircraft engines, and solely focussed on making cars however their logo is a tribute to this.
Volkswagen Logo:

To the average person the Volkswagen logo looks like a W, which honestly reminds me of the W on “Warios” Hat from the “Super Mario Brothers” franchise. However look closely and the top of the W looks like a V. Meaning the logo is showing VW standing for Volkswagen.

A car that comes to mind when I hear of Volkswagen is the “Volkswagen Kubelwagen”
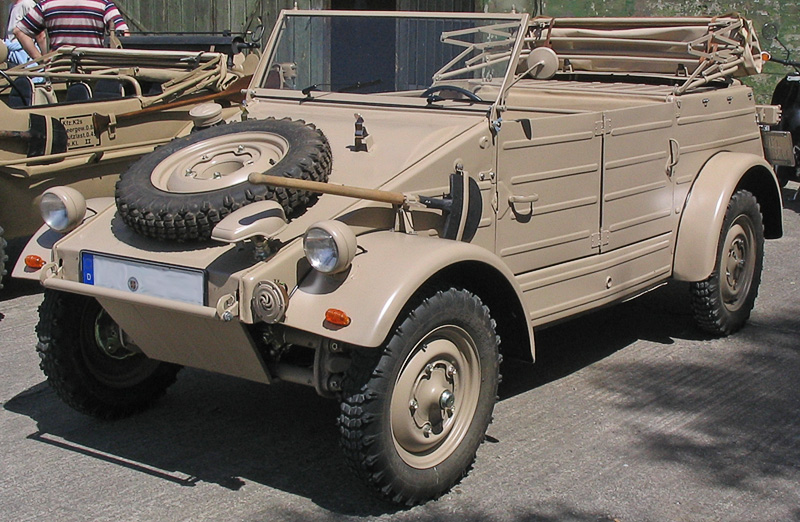
It was a common vehicle used my German Soldiers and other members of the army in WW2. I really like the design of this vehicle. The structure mainly consists of straight edges not many curved corners other than the fenders around the wheels, this gives it quite the industrial look. Because the construction of the car is relatively simple it would been a lot easier to produce than more luxurious cars.
E.g. WW2 German luxurious car example
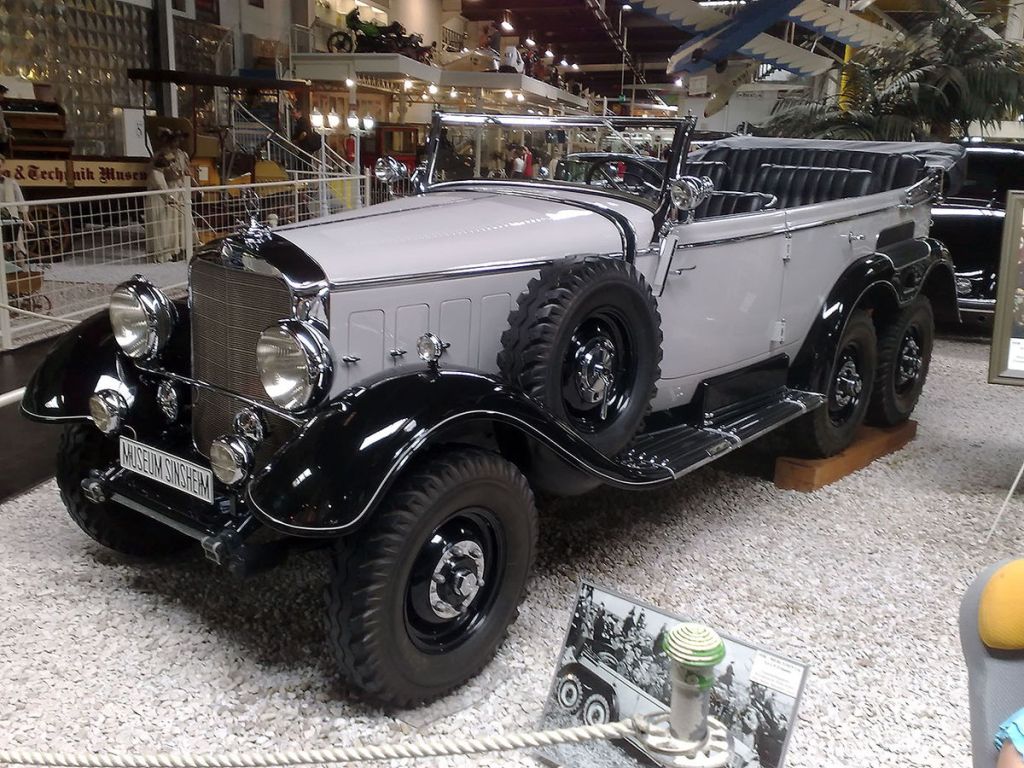
Mercedes Bens W31, often seen in Germany with high ranking officers, luxurious, clean aesthetic, lots of silver and curved parts. This luxurious appeal would soon be ruined should it be sent to the battle on the front lines. A complete waste of resources.
You want a car to be easy to build in a war so that you can produce as many as possible, and there going to get smashed, shot at and destroyed by the opposition, so losing a cheap car is much more insignificant to the resources of their country.
On a side note the “Kubelwagen” did not not have a radiator installed and relied solely on air cooling to cool the engine down. This was to make the vehicle less susceptible to gunfire or shrapnel damage.
The part of the name “Kubel” is the German word for cube. When translated to English the vehicle is basically called “cube car” referring to its box like look.
Update 05/12/2022:
Following what I said about it being called a cube car, It may have another meaning the word “Kubelwagen” contradicts the word “Kubelsitzwagen” which when translated means bucket or tub. The soldiers of the German army would refer to the car as “bucket seat car”. Essentially a tub fitted with bucket seats and then doors to prevent riders from falling out.
Its quite a crude description but it places emphasises on the shape of the vehicle looking like a tub and also how simple and basic the construction was, to keep it cheap. I’m guessing it wasn’t the most comfortable vehicle to ride in, with no roof or enclosed space to protect the occupants from the elements, however an argument for this is that being open topped means that the occupants can quickly disembark and get to cover, crucial if you plan on staying alive in a battle.
I have tried to include straight edges and sharp angles in my design as I like the industrial, aggressive like aesthetic. And also function over form was my first concern when creating the car.
Nissan Logo:
I like the design of the Nissan logo due to its simplicity. The Embossed effect with the text in the metal, gives it a clean modern look. The shape of the logo is similar to that of the Japanese Flag, so this is referring to the companies origins. Since it is a Japanese car brand.
The choice of using a shiny metallic material reflects how modern and advanced the Japanese company is. Japan is often known as the most technologically advanced country in the world.

From what I also found out, I’m not 100% sure I keep finding conflicting data but the characters “Ni” in Japanese mean Sun and the characters “ssan” mean birth/ produce. Japan can sometimes be known as “The land of the rising sun” as the country is considered close to where the sun rises. So the name “Nissan” is a tribute to its home country.
Lamborghini logo:
I’ve looked at this one as the themes behind it are somewhat similar and relevant to my style of vehicle I’ve made and will be helpful when I come to make my logo.
The image of strong powerful Bull, readying for a charge, represents Lamborghini’s high speed, high powered vehicles.
strange Analysis I did below but:
If you were for some reason thrown into an an arena and pitted against a bull like in the image above with nothing but your own arms and legs to defend yourself and fight back, your probably not going to win. A bull is very tough opponent to defeat.
What I’m trying to say here is the image of the bull represents Lamborghinis pig-headedness of not to be outdone. Trying to be the best of the best.
Since gold is a rare and expensive material. The use of it in the logo suggests the luxury and high value class of Lamborghini cars.
Since Lamborghini is based in Italy. The use of a bull could also be a tribute to one of the most prominent Italian cities “Turin”. Since “Turin’s” Coat of arms features a bull. I maybe be totally wrong though.
Turin Coat of Arms:

Logo Sketches:
My Vehicle Company/ brand:
Alltracks specialises in creating civilian track based vehicles mainly for off-roading purposes.
I’ve decided to use the name “Alltrack” for my vehicles company. Relatively simple meaning. But it suggests how my company produces only tracked vehicles. However The word “Alltrack” also sounds similar to the word “Attack” Generally if you want to attack or siege something and make sure you come out on top, your going to want to be as strong as possible. Therefore it could suggest how the vehicles my company make are strong and powerful in terms of engine and off-roading capabilities.
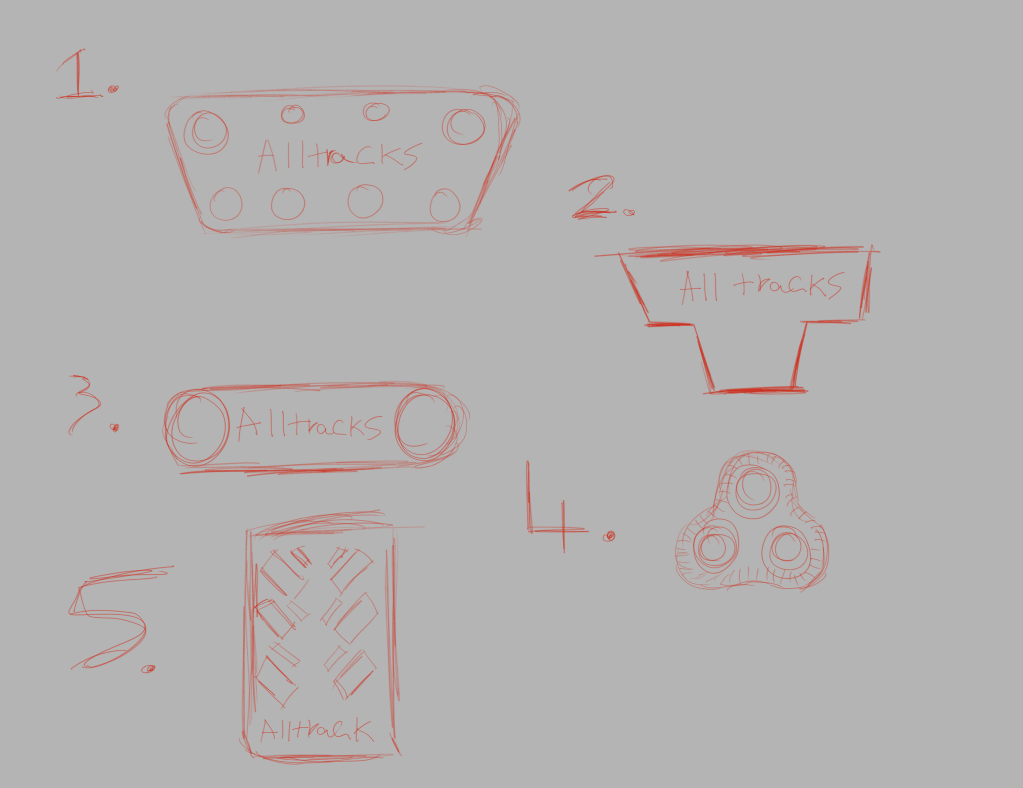

Logo design reasons: (Number corresponds to each logo.)
- Logo in the shape of a track from a side view.
2. Individual Track Tread, from a side point of view. Also looks like a T, suggesting track.
3. Simplified, flatter track from side view.
4. Small triangular shaped track tread. Circles represent track wheels.
5. Track Logo front a front view. The small boxes inside represent the tread on the track.
6. Track Wheel Cog (powered wheel in corner of tracks)
7. Track deformation in ground such as dirt. (similar to tyre tracks)
8. Roman numeral for 4, suggesting 4 tracks. the “I” looks like a tyre track.
9. Similar to that of an army rank badge, kind of looks like tread from the front. 4 Arrows symbolising 4 tracks.

Decided to go with logo option 1. Reasons why I didn’t use the others listed below:
Logo 2: looked to similar to that of the “Chevrolet” car logo. Or “Tesla” car logo that uses a T for its logo. (Already been done before)

3. Too Basic/ simple (boring)
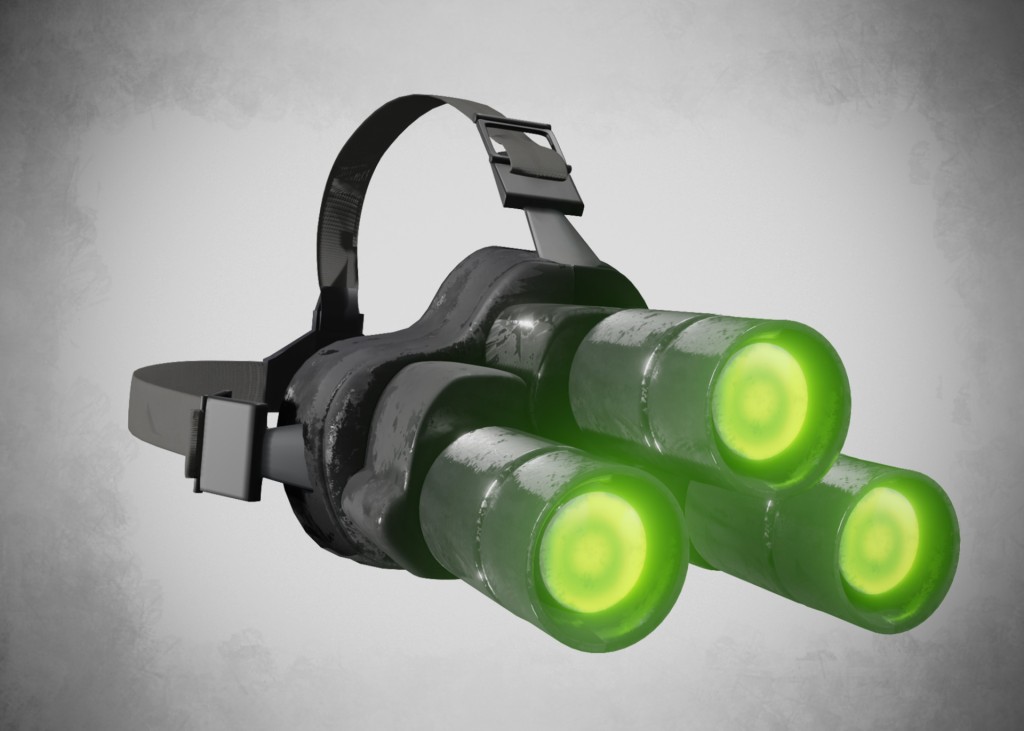
4. Might be difficult to understand what it is, for someone who hasn’t seen a track in this shape. But also reminds me of night vision goggles due to the shape of the circles alignment which is not what I want here.
5. Again might be difficult to understand. And I feel when I come to add colours, using something other than black/ grey would look strange on track treading. I’m thinking of going for a shiny metallic colour for a modern clean look.
6. Decent idea, cogs are also used in engines for gears, however I preferred option 1, as its more clear about what the company is about.
7. Reminds me of roadkill.
8. Basic a bit boring, its just the number 4 in roman numeral.
9. Don’t want my vehicle company logo suggesting army, too similar to army rank.
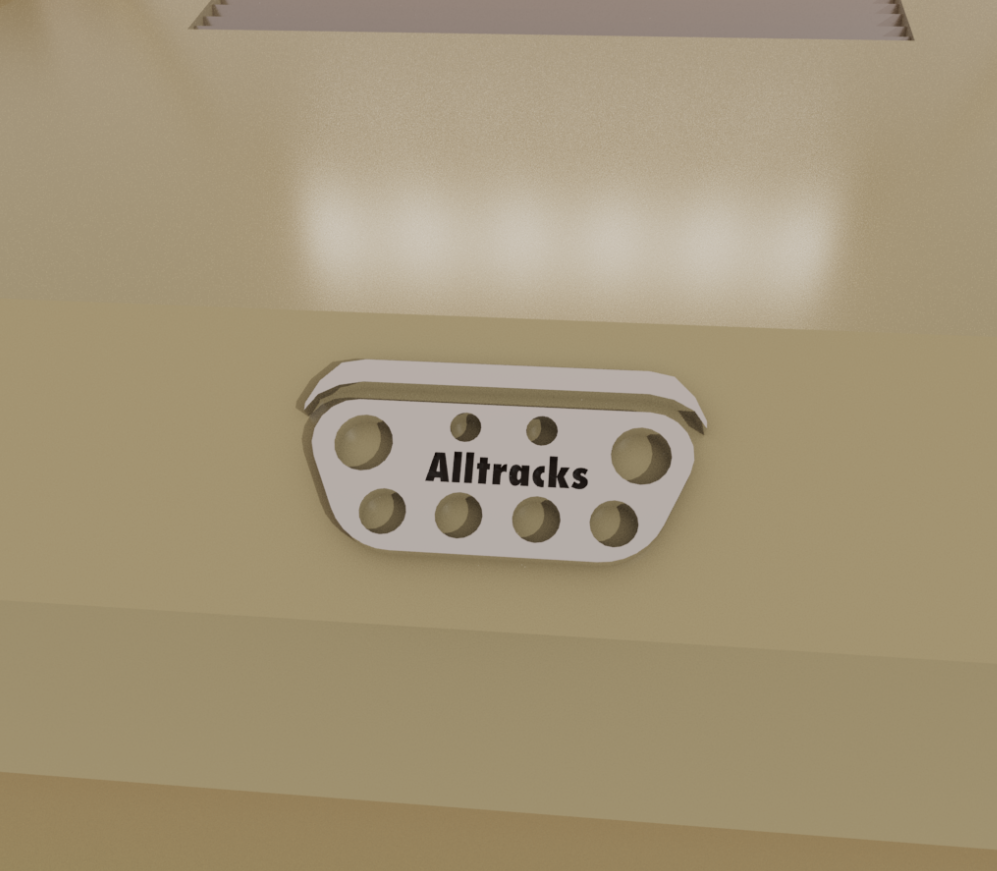
My logo development:

(ignore the current colour of my logo, it isn’t that colour when properly rendered, looks like this when you chose a metallic material whilst still in editing mode).
Here I’m going to use a new technique I learned from the video above to cut out holes in the shape I created. The Tool “Boolean” allows you to cut out a shape using an object from another object. The cut out shape is meant to represent a wheel in the track.
Typeface Selection:
I chose the font “Impact”
Since this is the font for the vehicles company not the vehicle itself. I went for a less aggressive looking type than what I chose for my vehicles name.
Impact uses large bulky letters “Aggressive, loud like” however it also uses soft rounded corners “innocent, kind”. By having two different types of feelings emanating from the logo it could suggest how my vehicle company produces a wide range of tracked vehicles for a wide range of audiences/ customers. From sports cars with tracks, Monster trucks with tracks to tractors with tracks. There’s something for everyone.


After applying some materials it turned out that the logotype is very difficult to see. So to fix this I decided to emboss my logotype into the surface using the same technique I learned earlier for cutting holes.
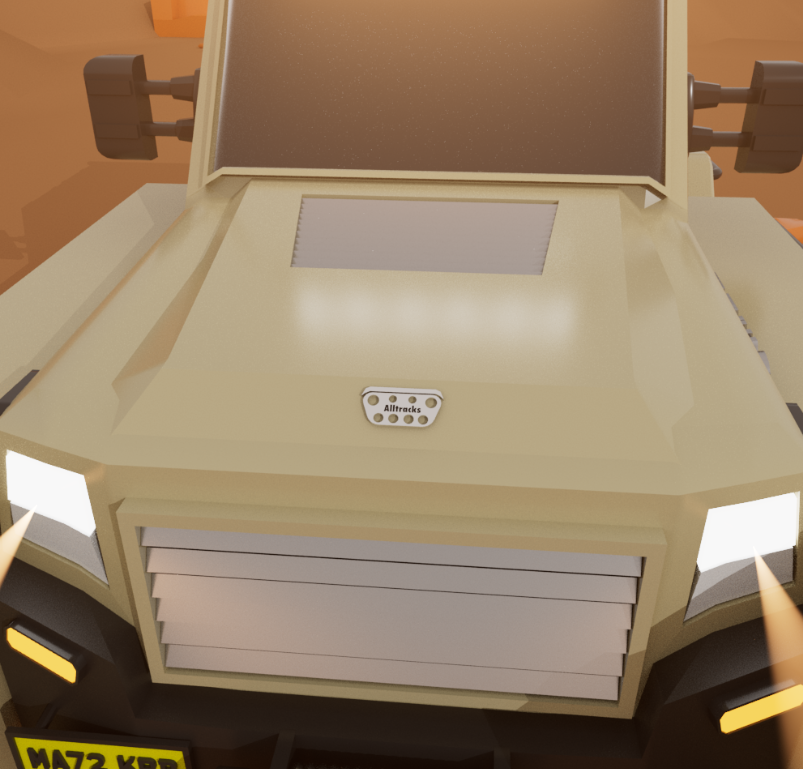
Now on the bonnet and starting to look good.

I didn’t mention this earlier, But as you can see I’m going for a track shaped logo. The holes represent the wheels in the track. However if you take a closer look at the finished logo it kind off also looks like a knuckle duster. A fist based weapon, therefore again it could suggest/ refer to how my vehicle is prepared/ ready for action.

Update 05/12/2022:
Changed the logo type from “Impact” to “Futura Condensed Extra Bold”
Following what I previously said about my typeface selection, I’ve realised that Using “Impact”. And what its mixed effects suggests and how its about something for everyone conflicts with my idea of aggressive and powerful vehicles that the name and shape of the logo suggests.
The new typeface now fits into that criteria of aggressive, powerful, loud I was going for.
I’ve also changed the material of the logo from chrome to a brushed metal look. Chrome is too reflective and ends up changing the colour of the logo to a sandy colour due to the beige colour of the vehicle body. And I’ve now made the letters black now to make them clearer and stand out more from the rest of the logo.
This is a darkish scene so the lighting is reduced in the image below

Image of logo in the daytime:

Update: 06/12/2022
So initially when I mentioned just earlier about my logo having a subdued sandy look when using the material “chrome”, I didn’t realise this until I tested around with lighting again but it was actually just to due my scene being a night/ dusk scene with the sun setting, After turning the lighting up again it looks completely normal like chrome should. Shiny with a bit of reflection of the objects around it.
So I’m going to go back to using the logo with chrome. As its brighter and has a shinier look to it. I want to use a material like this to suggest that the vehicles that this company makes are the best of the best and are highly modern.. That and it just looks really clean.
Logo Text Fix:
The Logotype wasn’t quite centred on the the logo in the images above didn’t notice this until now. Updated car logo below.
The Logo was bugged/ not working properly in maya so I had to remake the whole thing. When trying to change colours or move typeface it would break, so this version looks a bit different now. Mainly just the fender shape above the track changed.

Updated/ Finished Logo description:
Main logo shape represents a track, however the shape also looks like brass knuckles or a knuckle duster. This suggests how the vehicles my company make are powerful and strong. A weapon is something you take when readying for battle which shows how my vehicle is ready and prepared for anything that it comes across. In this regard my vehicle logo has a sort of hidden extra meaning behind it that you might not immediately recognise.
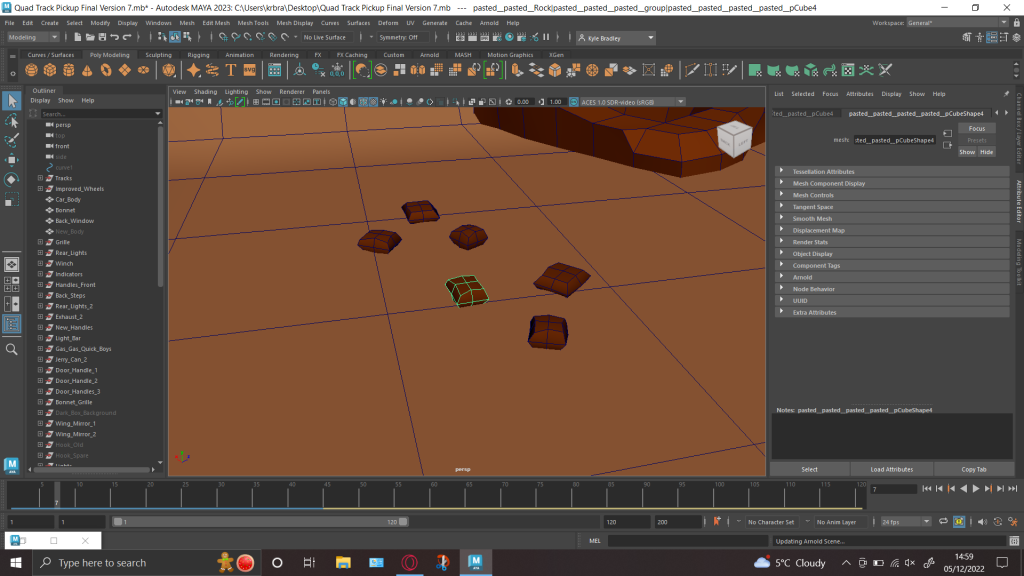
Extra Background Rocks:
Added some more rocks to the background to liven up the rest of the scene a bit more. I mentioned earlier it was looking a bit barren and boring near the back.
Making new rocks:


Final Changes before Submission:
These Changes are visible in my Final Renders Below, (Some of these changes are now also visible in the images above with my logo.
- Reduced Window shine – it looked a bit too metallic like in some images above.
- Reduced Lighting – To make it more of night scene and then the headlights on makes sense. I want to keep the headlights on. The light cones give of a nice luminous effect. – After testing I have instead decided to only reduce the lighting by a small amount otherwise it becomes difficult to see the details of what I have created.
- Changed Lighting Colour
5. Vehicle name Changed from “Challenger to Gauntlet”
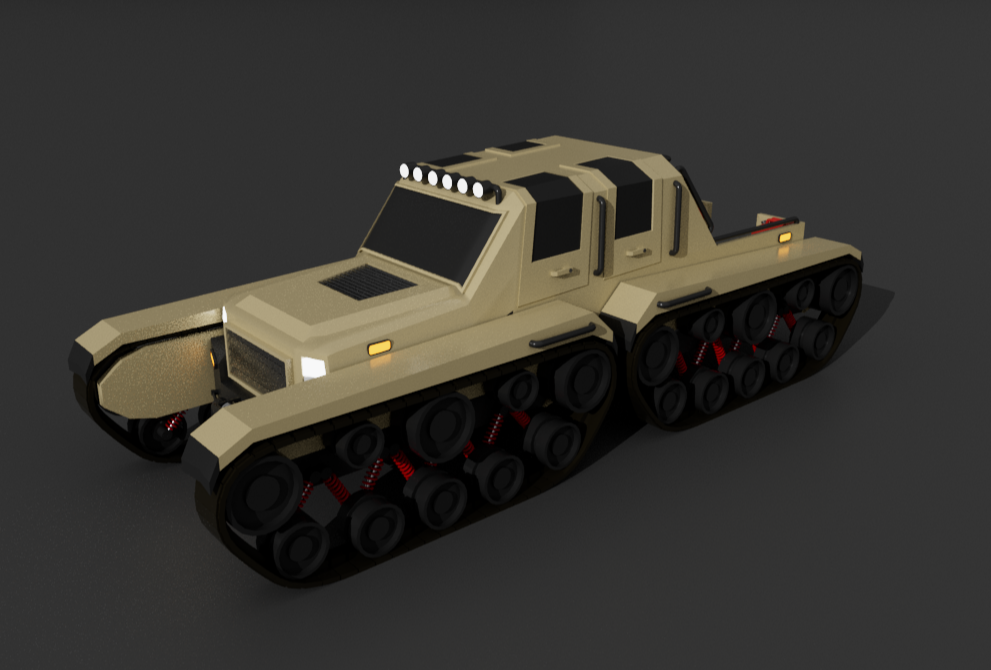
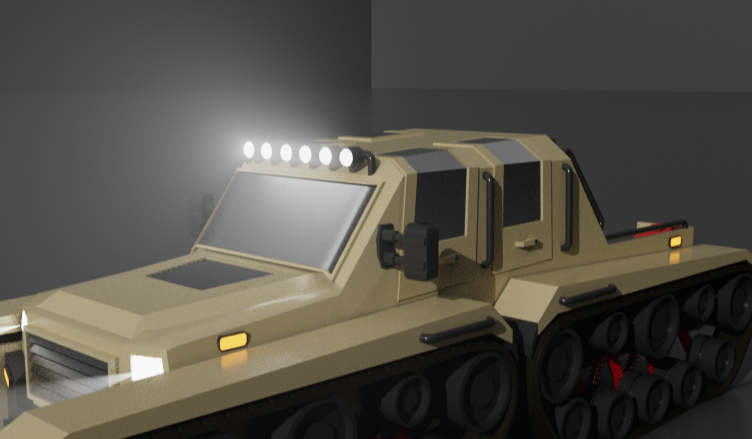
Final Product, Video and Renders:
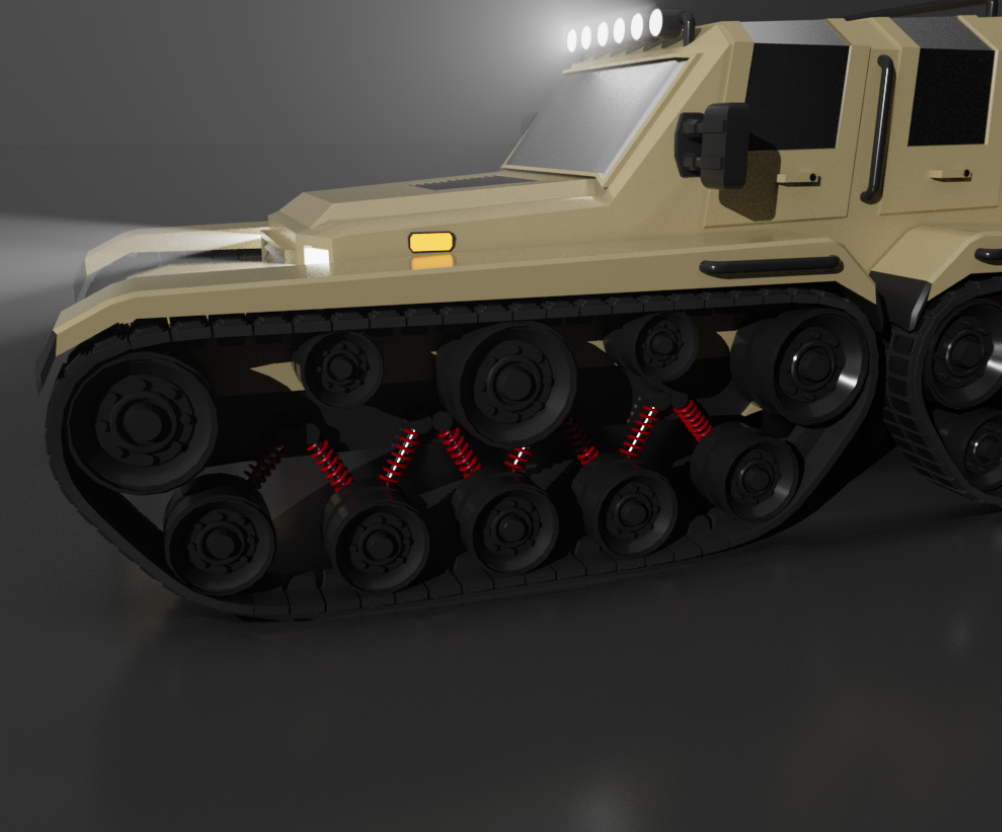
Some renders from different POV’s rendered at 72dpi for screens.
I’ve only done a few final renders from different angles as It can take quite a while to render just one.
The background is not fully decorated from all angles as it not needed for the render I will submit to the brief (Further Down)


For my final piece as you have seen I have set the lighting to a dusk/ sun going down like atmosphere. I wanted to do this to emphasise the lighting and really make it pop and stand out. It can also suggest how my vehicle is suitable for use at anytime of the day. “Even off-roading at night is no challenge for this machine”. I cant make it too dark though otherwise things become hard to see.
Since my project is quite resource demanding on a computer/ mac I’ve also decided to create a bit of quick video to show you the models and background I have created from the software/ editing Point of view. The Maya Project file size ended up around 500mb.
This is basically a sort of behind the scenes video.
The colours are subdued and lighting/ shadows is turned off whilst editing a piece of work inside of “Maya”
Chosen Render for Brief Submission:
You can only submit one final image of your render to the competition so below is the image I set up and rendered. I rendered this one at 1920x1080p (16:9) for widescreen.
I Also added the Hum3d stamp to the bottom right corner, as required by the brief.
Link to my submission on Hum3d website click here to view.
I would of liked to render the images I submit to the brief in 4k Resolution, for maximum quality and crispness however the brief has a file size limit of 2mb. A 4k image of my work is well over that. So I’m sticking with 1080p at 72dpi.

I went for a side front view, as it means you can see the whole size of the vehicle and can also see some of the details on the front, with a good portion of the background in view as well.
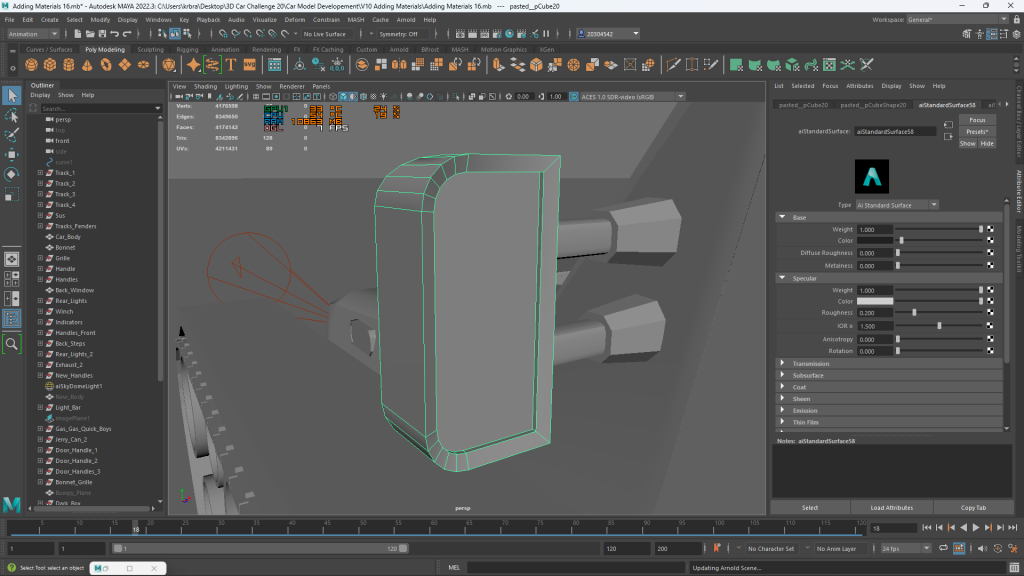
Clay/ Mesh View – Also required as part of submission (To show proof its your own work)


I also need to post a link to my WIP blog which will be this same page.
I realise that my 3d skills are far from that of which I’ve seen on other pieces of work submitted and I’ve a long way to go, despite this I managed to get to some nice positive feedback which is encouraging.
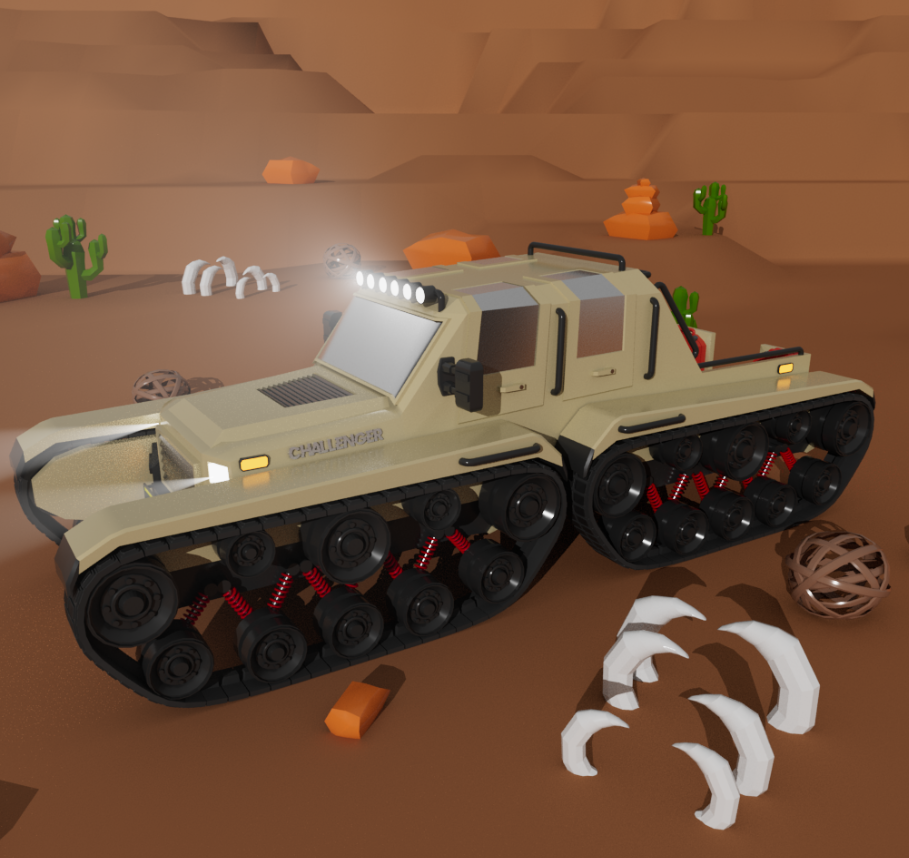
4×4 Quad Tracked Pickup Truck: Summary And vehicle Description.
Some parts of this explanation could be a repeat, its just encase I’ve missed anything throughout my blog.
Gauntlet QTV:
QTV = Quad Tracked Vehicle
Gauntlet is an extreme off-roading vehicle designed to the push the limits of what’s possible when off-roading. Its quad track setup means the vehicle was high grip on all surfaces. The tracks are articulated meaning that they change their up and down position as they go over terrain ensuring that they can combat any type of terrain or slope they come up against. The vehicles 4 door configuration and pickup style setup means that the vehicle can carry numerous people and cargo. Its recommended to put spare fuel, parts and tools in the back if going on a long off-road adventure, to ensure the vehicle stays in top condition.
The vehicle also has a number of other features that come in handy for a lot of situations.
Tow Bar: If manage to get this machine stuck somehow, the strong tow bar will help you out in a pinch.
Floodlights on Roof: Illuminates a large area in front the vehicle, Needed if off-roading at night. Normal headlights wont provide sufficient light to see everything in a off-roading scenario.
A-Bar: (Bars on back of vehicle) Protects body work of vehicle when carrying cargo.
The vehicle also features plenty of other handles around the vehicle for tying objects/ cargo to or for towing.
One of my favourite parts of the vehicle is the suspension, because of the colour I chose. A bright red really stands out well from the Suttle beige colour of the car and contrasts the black used on the tracks. Red can also suggest power, which puts emphasis on the power and strength of the vehicle.
Project Evaluation:
I initially chose this project to take my 3D skills to the next level, which I have been able to do just that. Gone from being able to make simple box with a handle to making a detailed car and background consisting of assets I had made myself. Later on in the project I even tried combining my logo knowledge and trying to apply it to 3d software, which can create some interesting results. The ability to use materials in 3d allow you to get a life like look e.g. Chrome material I used on the logo, is reflecting lights and colours just as It would in the real world.
Early on in the project I also experimented with trying to get the tracks and wheel spin. This wasn’t necessary for the brief but wanted to learn how to do this as an optional thing.
I think the final outcome has turned has really well despite the limited timeframe I had, and lack of my 3d skills, which I am quite surprised by how much I haven been able to develop them in such a short time span. The visual aesthetic of the low poly/ cartoon style, simplifies and abstracts what would otherwise be realistic objects. The contrast between the different colours separates and allows each one to stand out individually.
Id feel confident now if someone asked me to make some sort of object in 3d.
I think one of the reasons I enjoy working with 3d software is due to the higher level of interactivity and full 360 degree view when creating a piece of work. As opposed to working on a 2d image. When a 2d image is complete you can only view it from one perspective. However 3d pieces have a whole range of possibilities: Angles, lighting, distance etc all go into consideration when rendering the final images/ product.
One change I could make if I had more time on this project is too add the logo to the back of the car, but seen as on my final image you cant see the back of the car this didn’t really effect what I submitted to the competition. I’ve also just noticed this right at the end but the size of the number plate could do being a bit bigger, it looks a bit small compared to the rest of the vehicle. These would only be minor fixes/ changes though.
Overall this was a really good project to undertake and I’ve enjoyed doing it.
Brief 4: YouTube/ social media channel rebrand:
The Final ICP project…
I’m thinking I need a bit of break from 3d work, since I’ve been doing it for quite a bit now, and I’m going to return to the realm of 2d for my next project.
